No cramped space and no offense: a small brick oven will heat the entire house and will not take up much space
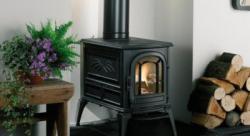
Brick ovens, even the smallest ones, have many advantages in front of metal heating devices.
Iron stoves heat up very quickly, but also cool down quickly, without heating the air. Mini-oven made of bricks gives off heat for a long time And maintains a comfortable temperature for several hours.
This heating structure can be made independently, without resorting to the help of a professional stove maker.
Content
Brick mini-ovens schemes
Small ovens take up little space, the dimensions of their bases hesitate from 50 to 70 centimeters in width and up to 65-100 cm in length. Height heating facility is from 1.5 to 2.3 meters. The stove is equipped with a hob, oven, and water heating tank. Stove makers have also developed devices designed only for heating the house.
Small heating structure
This is the simplest heating structure. Let's look at a model of the following dimensions:
- width grounds - 51 cm;
- length bases (depth) - 89 cm;
- height — 238 cm.
The mini-oven is installed in the middle of the kitchen or against the wall. Optimal heating area - 20-35 meters. Interior partitions are erected around the stove, which allows heating both the kitchen and the adjacent room.
Inside the device are located:
- combustion chamber;
- ash pit;
- smoke channels leading into the chimney.
Furnace door mini ovens (cast iron or glass) is chosen depending on the aesthetic preferences of the owners of the house. A door made of heat-resistant glass, through which you can see how the wood burns, makes the structure look like a fireplace. In the middle and upper parts stoves are installed two smoke dampers. There is one door for cleaning the channels. To build this model of the device you will need:
- 260 pieces bricks ceramic;
- 130 pieces of fireclay bricks;
- grate (40x23 cm);
- firebox (30x20 cm) And blower (20x14 cm) doors;
- 2 doors for cleaning holes (20x40 cm);
- metal firebox sheet (50x70 cm);
- two sheets roofing felt measuring 60x100 mm;
- sand and clay (or ready-made clay-sand mixture for masonry), clay-chamotte mixture.
Reference. The mortar increases the volume of the device by the thickness of the seams.
Base and top The mini-oven is lined with ceramic bricks on a clay-sand mortar. Firebox They are laid from fireclay bricks on a clay-fireclay mixture.
On long side the base fits three and a half bricks, on short - 2 standard bricks 25 cm longThe height of the masonry consists of 35 rows.
Small heating and cooking stove
This is a mini-oven model for heating and cooking food - a convenient and very compact structure. Optimal area of the heated room at sub-zero temperatures - 20-25 square meters.
The device has the following dimensions:
- length bases (depth) - 64 cm;
- width grounds - 51 cm;
- height — 215 cm.
The structure is being erected in the kitchen. The device includes:
- ash pit;
- combustion chamber;
- smoke channels leading to the chimney;
- cooking grate;
- niche for oven.
Cooking flooring made of cast iron has a hole that is closed by a disk and a circle. There are also solid floorings on sale. niche for the oven chamber place a metal oven or a hot water tank with a tap. If the niche is left free, it is used for drying things. For the construction of the stove will be needed:
- 222 pieces of ceramic bricks;
- grate (40x25 cm);
- door for the firebox (20x20 cm);
- door for the blower (14x14 cm);
- brewing flooring (35x38 cm);
- metal oven or water heating tank;
- iron firebox sheet (50x70 cm);
- two doors for cleaning holes (20x14 cm);
- two valves;
- a piece of flat slate;
- steel angle;
- clay, sand or ready clay-sand mixture for masonry.
How to make a small-sized stove: recommendations and step-by-step instructions
Before starting the laying, preparatory work is carried out. It includes the following stages:
- choice project;
- selection and purchase materials;
- purchase of metal stove parts;
- Preparation tool, containers for solution;
- Preparation places for building a stove;
- construction mini ovens.

Selecting a project
On the Internet and in textbooks on stove making there are step-by-step diagrams and drawings of dozens of mini-stoves.
The choice is great, but if the home craftsman has no experience at all, it is worth consulting with local professionals or with people who have successfully built similar stoves. When choosing a device that you plan to build with your own hands, take into account several factors:
- square heated premises;
- quantity heated rooms;
- temperature air in winter;
- frequency of use heating facility;
- appointment mini ovens;
- experience furnace construction and repair;
- material cost.
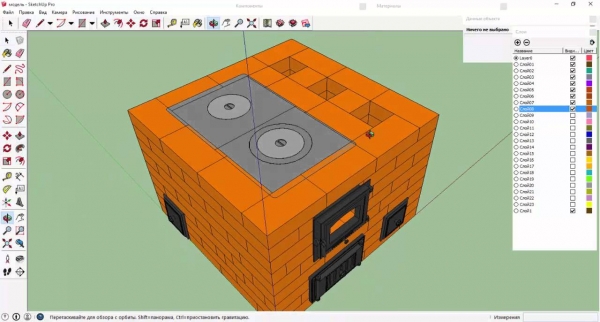
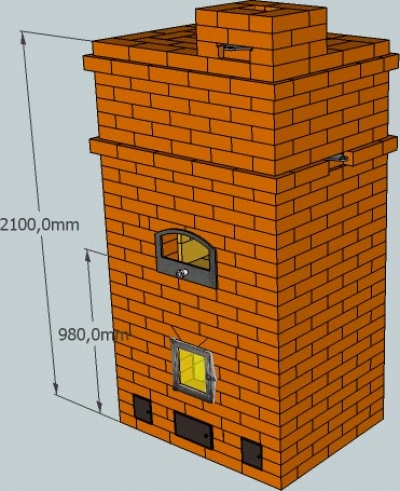
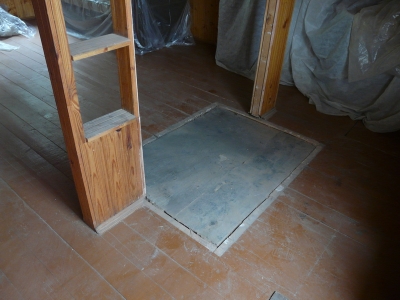
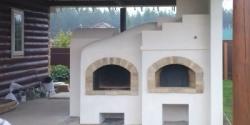
Photo 1. Before starting construction, it is very useful to model the appearance, dimensions and order of the future stove.
If it is planned cook food, the option with a hob and oven would be preferable. The need for hot water in winter and in the off-season will close the water heating tank in the niche. In it, by removing the removable tank, you can dry shoes and other thingsIf the house always has electricity or a gas stove, choose a stove option without a hob and a niche for the oven.
For regions where winter temperatures drop below 20 degrees and stays at this level for weeks, it will do large-sized oven with heat shields. Mini-oven not recommended to heat continuously more than two hours in a row.
It matters to many people design construction. It can be tiled or laid out with bricks with a relief surface.
Materials
For the selected mini-oven project, you will need high-quality bricks. You should choose smooth brick grade 1, uniform color, without chips or cracks.
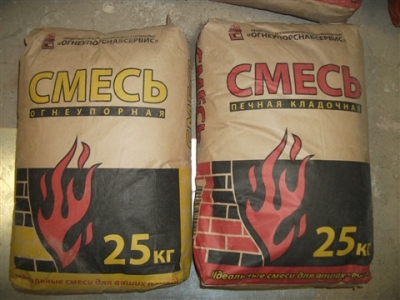
For laying bricks, it is better for a home craftsman without experience to choose ready mix in a hardware store. It is diluted according to the manufacturer's instructions.
If the master creates a solution from individual ingredients, you should purchase sand and clay. The ratio of materials is determined experimentally. The solution is scooped up with a spatula and its working surface is tilted at 45-50 degrees. Masonry mass normal composition does not fall in lumps from the spatula and does not flow off it.
Tools
To do this, you will need all the stove-maker's tools and a table on which you can stand when laying the top rows. In the list The tools include:
- spatulas: wide and narrow:
- trowel;
- expansion joints to form beautiful seams;
- trowel;
- hammer stove-maker with a flat butt and a pick;
- mallet;
- level long construction;
- plumb line building;
- wooden beam for the frame;
- threads, fishing line, chalk for marking the base;
- Bulgarian with a set of discs for cutting and grinding;
- rule aluminum.
Important! The temperature in the room during the laying of the stove and its drying should be positive (from plus 5 degrees).
To prepare the solution you need big tank. To mix the paste you need wooden stirrer (oar) and construction mixer.
Preparing a place for the stove
Before laying the mini-oven, prepare in advance foundation. This is necessary because even the smallest device with a brick chimney weighs from 500 kg and more.
This pressure on the floorboards will cause deformation of the floor and stove walls. This can cause a fire on the roof and in the house.
There are several options for constructing foundations. Construction of a concrete foundation for a mini-oven includes next steps:
- excavation of a pit depth 50-70 cm;
- compaction of soil in the pit;
- laying a layer of crushed stone in the pit (20-25 cm);
- laying sand in a pit (layer 15-20 cm);
- compaction of sand and crushed stone;
- waterproofing of the pit with roofing felt: joints are sealed with tar, bitumen mastic;
- installation of steel reinforcement with cell diameter no more than 8-10 cm;
- pouring concrete and compacting it with a vibratory drill;
- laying two layers of roofing felt on dried concrete for additional waterproofing.
Important! The stove is built on a foundation that extends beyond its perimeter. by 10-20 cm. It is recommended from the firebox side leave 50-70 cm foundation in order to mount a firebox platform on it.
Masonry order
Laying of ceramic bricks is carried out on a clay-sand mortar on a prepared foundation:
- 1st and 2nd rows. Solid masonry.
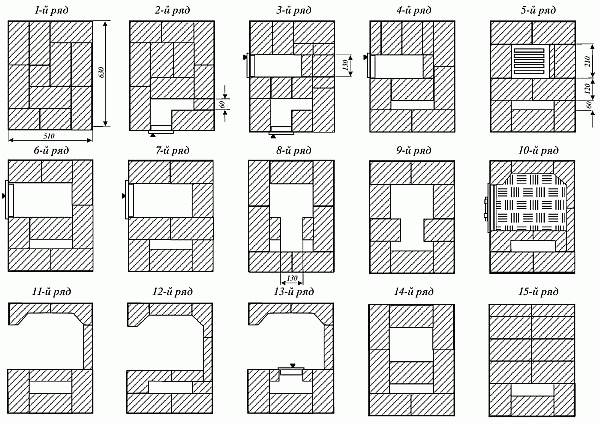
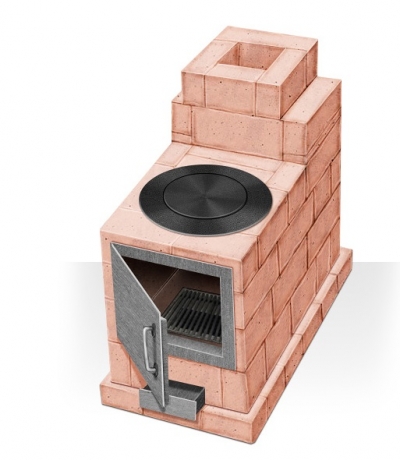
Photo 2. The layout of the first rows for a small heating and cooking stove. Next comes the chimney pipe.
- Row 3. They lay out the chamber for the ash pit. They install (on wire or metal strips) the ash pit door.
- Row 4. The laying of the ash pit and the strengthening of its door continue. The ledge for the grate is laid out.
- Row 5. The grate is placed freely on the ledges, without mortar. Around it, gaps of 5-7 mm.
- Row 6. The firebox door is installed in the furnace portal. It is fixed by laying steel wire in the seams or using steel strips. The strips are also laid in the seams on the mortar.
- Rows 7-11. Laying the firebox, final fixing of the door by laying wire (steel plates) in the seams on the mortar.
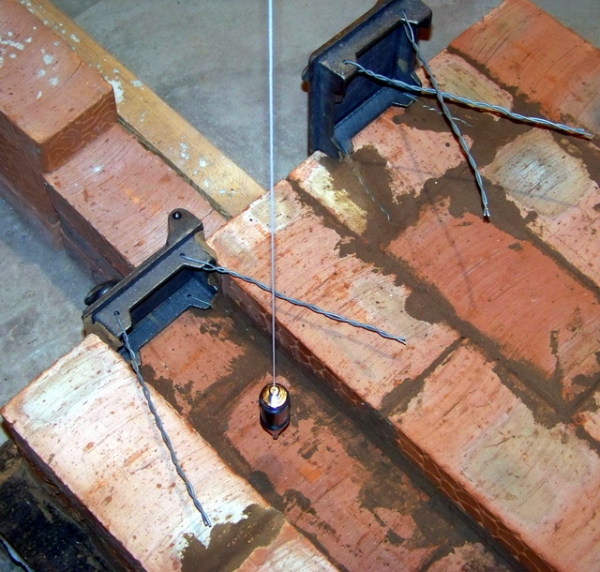
Photo 3. Installation and fastening of the doors for the firebox and cleaning. The accuracy of the tub is monitored using a plumb line.
- 11a. Upon completion 11 rows A metal strip (or corner) is laid on which the cooking deck will rest. After this, the cooking deck is laid.
- Rows 12-15. Walls are erected around the cooking platform (cooking chamber), and a chimney leading from the firebox is laid out.
- 15a. In order to create a vault made of non-combustible material above the cooking chamber, a sheet of flat slate is placed on it.
- Row 16. The vault of the cooking chamber is closed with solid masonry, and the chimney continues to be laid out.
- Row 17. Installing a chimney cleaning door (on wire or steel strips).
- Row 18. Securing the door.
- Rows 19-22. Laying according to the selected scheme.
- Row 23. Laying out a niche for the oven.
- Row 24. Laying the oven walls, installing the oven. Asbestos cardboard strips are placed on the bottom of the chamber along the perimeter. The oven is wrapped with asbestos rope (for greater contact with the brickwork and heat accumulation) and finally installed in the niche.
- Rows 24-27Brickwork is erected around the oven.
- Row 28. Installing a second door to clean the flue.
- Row 29. Installing a damper above the smoke channel.
- Row 30. Laying according to the selected scheme.
- Row 31. Installing a second damper above the smoke channel.
- Row 32. Completion of masonry.
Besides this, Row 32 is the basis for construction chimneyIt can be made of brick or metal.
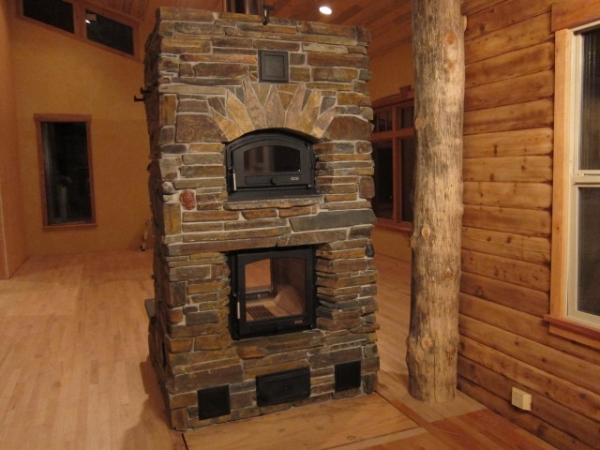
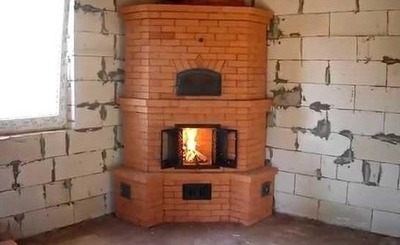
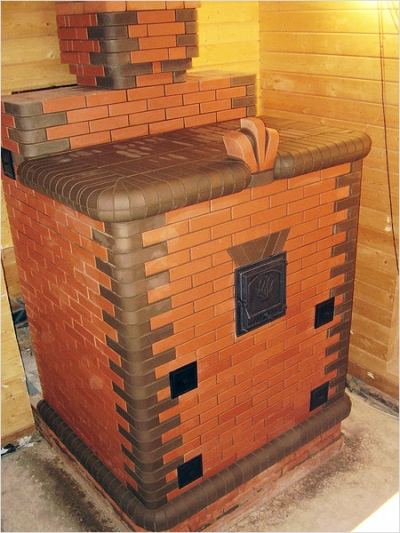
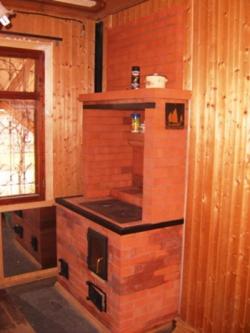
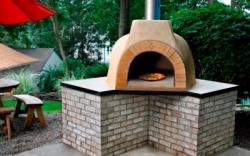
Photo 4. An example of a finished brick mini-stove with decorative trim. The design is not intended for cooking, but it will heat the house well.
Problems with building a mini-oven with your own hands
Amateur stove-makers commit acts of inexperience mistakes, which then lead to problems. Let's look at the most common cases:
- Laying stoves with deviation from the project. As a result, there is no normal draft in the smoke channels, the walls are heated unevenly. The solution to the problem will be dismantling the stove and laying it according to proven schemes.
- Laying stoves "by eye", without using a level, frame, plumb lines, or a rule. The device becomes skewed, the center of gravity shifts, and the device collapses faster during operation.
- Incorrect preparation of the solution. The masonry is cracking and crumbling. A temporary solution to the problem is to buy a factory mix and sealing cracks with new mortarIf the masonry cracks constantly and deeply, the stove will have to be relocated.
- Firebox of a freshly built and not yet dried device. This will lead to cracking of the masonry, which will have to be cover with mortar.
Useful video
Check out the video, which shows an example of building a small heating and cooking stove with detailed explanations of each stage.
Recommendations for using a brick oven
It is recommended to build a compact stove of simple design in small temporary housing buildings. These can be summer cottages or temporary buildings built by the owners of the estate next to the cottage being built. Mini-oven also ideal for heating small industrial premises without central heating: workshops and cabins in rural areas.
Comments
And for heating with the possibility of cooking - a stove with a single burner.