2 Types of Brick Chimneys for Stoves That You Can Build Yourself: Classic and Winding

A smoke exhaust pipe is one of the key elements any heating device that runs on solid fuel.
Chimney removes hot gases to the outside, provides traction, necessary for the correct combustion process of fuel in the combustion chamber.
From the chimney in many ways depends on the efficiency of the furnace, the efficiency of its additional functions and the features of heating the air in the room.
Types of chimneys for a brick oven
Chimneys classified by material manufacturing, and by type of construction. Construction of a pipe from bricks — this is a traditional option. Often the chimney is made of clay, concrete or other mixtures.
Modern designs often make metal, which allows you to save on construction and makes its installation easier.
They are often encountered combined types, when a metal pipe is insulated with brickwork or sandwich panels. The design of the chimney can be vertical or horizontal.
Scheme of the classic version
This type of chimney is direct exit from the firebox: smoke and hot air rise and are discharged outside. Advantage vertical smoke exhaust pipe is better traction. A zone of rarefied air is formed in the combustion chamber area, due to which cold air from the outside is sucked in through the grate and provides an influx of oxygen for fuel combustion.
But such a structure also has its disadvantages: hot air is being released from the oven too quickly, most of the heat is wasted. That is why this type of device is most often used for devices whose main function is not heating. For example, a vertical chimney is ideal for equipping a cooking stove. The rapid removal of hot gases helps to avoid overheating of the kitchen and makes working in it more comfortable.

Photo 1. Scheme and order of a fireplace with a classic straight chimney. Hot air goes straight from the firebox into the pipe.
Dimensions vertical chimney depend on the height of the ceilings and the thickness of the floorsWhen installing a roof with slopes, the chimney pipe is made at least half a meter above the ridge. This will prevent a fire from starting in strong winds that direct the flow of gases horizontally.
Important! To increase efficiency vertical smoke exhaust stoves, often jumpers are used, causing a natural slowdown in the movement of gases along the pipe. Hot air remains inside the smoke channel for a longer time, giving off some of the heat to its walls. Such a design usually worsens the quality of the draft.
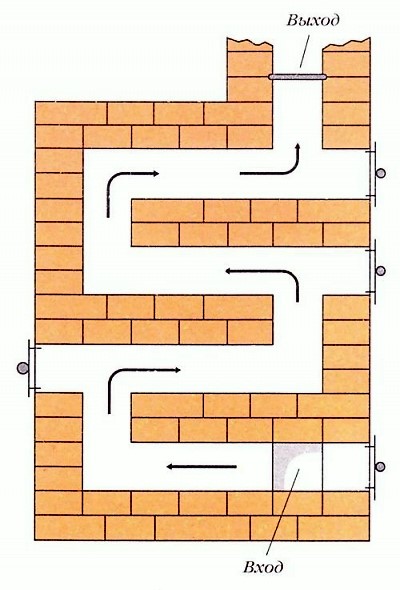
Horizontal type
Higher efficiency has a horizontal channel model. The movement of hot gases along it is not as rapid as along the vertical one. Therefore, the same volume of fuel allows to obtain much more high-quality warming up premises.
Cons chimney:
- decreased traction;
- rapid pollution channel with soot - it will require the installation of special hatches for cleaning and more regular maintenance of the structure.
Due to the high degree of heating of the walls, such models are necessarily provide reliable thermal insulationA good option would be to build a channel from brick, this material has the highest heat capacity.
When making a horizontal flue, it is necessary to approach the calculations more carefully. Section size pipes depends on the power of the entire device and the dimensions of the combustion chamber.
If the diameter is wider than necessary, the movement of smoke slows down, it has time to cool down in the pipe, causing the formation of condensation, which destroys the masonry.
If built incorrectly The chimney significantly deteriorates the draft, which affects the combustion efficiency and overall efficiency of the device.
Channel cross-section less than necessary, in turn, leads to constant overheating of the pipe and cracking of the masonry.
Reference. To increase the functionality of the stove, a chimney is often installed above the horizontal flue. a chamber for drying herbs, fruits, mushrooms.
The constant passage of gases through the channel ensures intensive heating of such drying chamber, which is often used to maintain the temperature of food and even to prepare certain dishes that require long “simmering” at a moderate temperature.
How to build a chimney with your own hands
The simplest way to install a stove flue is buy and install a ready-made one device. But in the case of brick wood-burning stoves built by hand, it is advisable post such a channel yourself.
Selecting a project
When choosing a project, they are guided by the following factors:
- Functionality ovens - if its main task is heating at home, it is better to choose a horizontal flue. For the arrangement of a fireplace, bearing decorative function or for installation slabs In the kitchen, the best option would be a vertical flue model.
- Power stoves - the cross-section of the chimney, and sometimes its length, depends on this indicator.
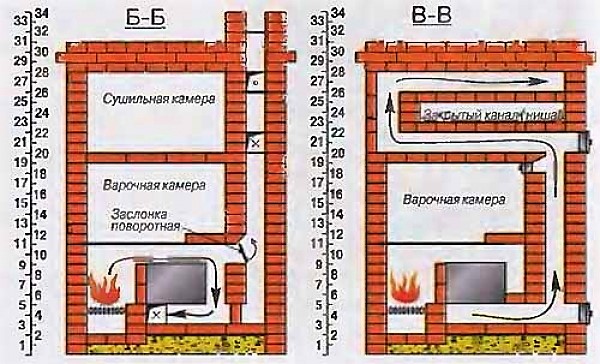
Photo 2. Example of a furnace diagram with a horizontal chimney. The drying chamber is located next to the smoke channels.
The frequency of use of the stove is of great importance. Horizontal flue will require more careful maintenance, so if the structure is connected only during rare trips to the country, the vertical model will be the best option.
Materials
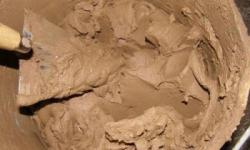
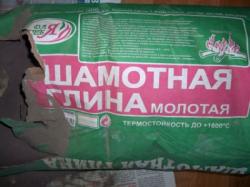
The temperature in the flue gas duct reaches high values, so only brick chimneys are suitable for making a brick chimney. heat-resistant solid brick and masonry solution based on fireclay clay. One of the significant points is the resistance of materials to oxidation by condensate. This is especially important in the case of constructing a horizontal chimney.
The work also requires metal parts — valves, nets, dampers. It is best to use models made of heat-resistant steel or cast iron, which can be purchased at hardware stores.
Tools
You will need the same for work set of tools, which is used to perform the laying of the stove:
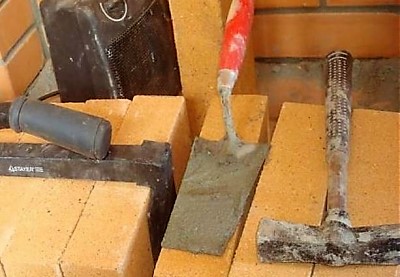
- capacity for mixing the solution and shoulder blade;
- trowel;
- stove hammer;
- rule;
- measuring instruments - tape measure, building level;
- auxiliary plumb lines, cords.
To install hinges and other metal parts you need welding machine.
Stages of work
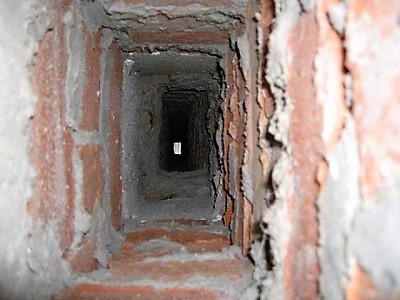
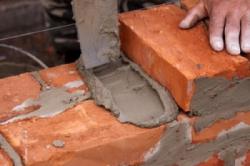
The main features of the chimney are: complete tightness and if possible smooth interior wallsTherefore, the masonry is carried out neatly and tightly, it is better if seam width does not exceed 3-5 mmThe work is carried out in the following sequence:
- Above the vault of the firebox is made first row bricks, which becomes the bottom of the chimney.
- They are being laid out two walls of the smoke channelAt this stage, special windows for cleaning are installed, into which metal doors are mounted.
- During work it is constantly carried out levelness check masonry with a building level.
- To reduce the accumulation of soot, the inner walls are made perfectly smooth, all Excess solution is carefully removed.
- The ceiling is being laid out smoke exhaust duct.
- In the overlap a hole is left for smoke to escape. The final vertical part of the smoke exhaust is then laid around it.
Important! After completion of the work, the chimney dry according to the same rules as the oven itself, gradually increasing the heating volumes.
Possible complications
When constructing a chimney it is necessary be careful and carefully follow the pattern. Extreme temperatures and their sharp changes place high demands on the quality of the masonry. When building on your own, it is often allowed the following errors:
- Incorrect calculations — the diameter and length of the chimney do not correspond to the power of the stove. This leads to a drop in efficiency, abundant education condensate.
- Wrong choice of materials - the use of ceramic bricks or non-heat-resistant mortar will lead to rapid depressurization masonry.
- Sloppy laying - different widths of seams cause them cracking and depressurization during operation, while the protruding excess solution will definitely become a place where soot and ash accumulate.
To avoid these common mistakes, it is important to do the following before starting work: consult with an experienced specialist and during construction do not deviate from the chosen masonry scheme.
Useful video
A video that explains and demonstrates step by step how to properly lay a brick chimney.
Why it's important to do everything right
One of the main features of chimney ducts is high fire hazardThat is why construction work requires increased attention.
Incorrectly positioned or not insulated The chimney often becomes the cause of fires in ceilings, roofs or nearby walls.
Particular attention should be paid to the location of the chimney. in rooms with wooden walls — a brick chimney must be insulated when passing through ceilings layer of solution, and the walls and ceiling are covered non-flammable material.
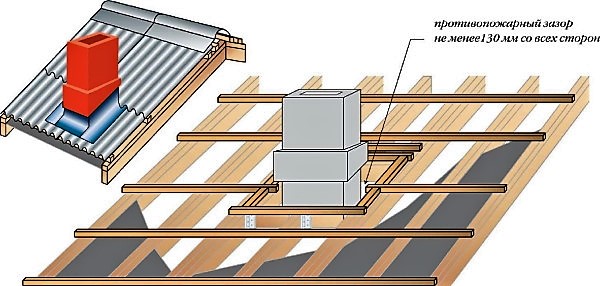
Photo 3. Diagram of the correct construction of a chimney: there must be a fire-resistant gap between the pipe itself and the wooden floors.
Despite the possible risk, a properly constructed flue gas duct easy to use, easy to maintain and quite safe. Chimney equipment often increases the heat output of the stove, which is especially important for those who like to live outside the city in the winter.


Comments
1) brick grade M-175;
2) masonry mixture;
3) antifreeze additives;
I punched a hole in the ceiling and removed flammable materials within a radius of 250 mm from the smoke. I laid the first row on waterproofing. Then I installed the chimney with insulation and continued construction (brick by brick). Then the heads and restored the waterproofing. I coated the edges and joints with bitumen mastic. THAT'S IT!