Savings for a blacksmith: making a muffle furnace for hardening metal with your own hands
A muffle furnace is a specialized design that allows heat various metals to the required temperature.
The muffle has the property of preserving the metal from direct contact with fuel or gases. Furnaces with a stationary heating chamber and replaceable muffles operate on a similar principle.
Content
Methods for hardening metal
There are several ways to process metals using this device:
- Heat treatment: annealing, hardening, tempering, aging.
- Working with valuable materials, remelting of metals when the use of open fire is not allowed.
- To receive even surface tone, especially when processing ceramics (highly artistic) a muffle furnace is used.
- Drying dielectrics.
- Cremation, combustion to mineral components.
How does a muffle furnace work?
In order to understand how the metal hardening device works, the process of interaction of various elements occurs, let's take a closer look at its structure:
- Furnace body. If you have an old gas stove with a built-in oven, it will be perfect for the base of the device. The best size for such an oven: 70cm-50cm-60cm. These dimensions are convenient for working with heat treatment.
Attention! If you decide to use a former gas stove as the main structure, then make dismantling plastic componentsOtherwise, all materials will melt.
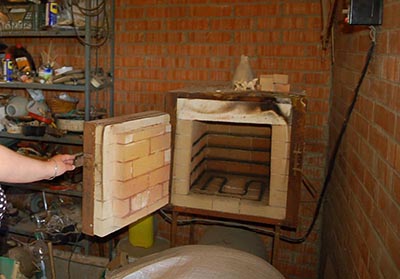
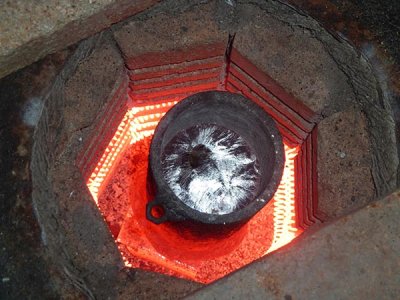
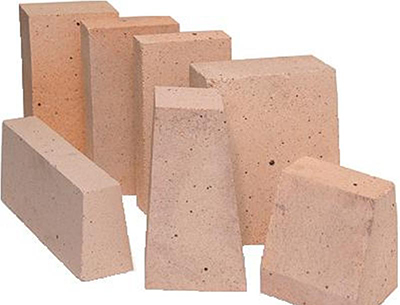
- Inner layer. Direct contact with the firebox surface. The efficiency depends on this part of the structure, so fireclay bricks should be used.
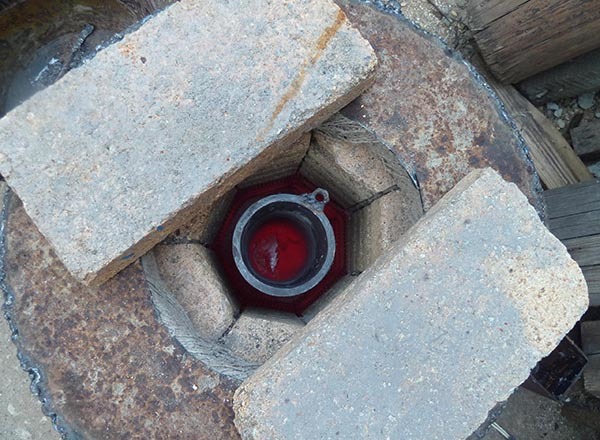
Photo 1. Fireclay firebrick is a mandatory element for the inner layer when making a stove with your own hands.
- Outer layerIts purpose is to reduce heat transfer losses. Perilite and basalt wool are widely used to achieve the effect.
Advice! Do not use asbestos as an outer layer. When heated, this material releases carcinogens.
- Heating of the working space. Spirals made of nichrome or fechral wire are responsible for the heating process of the entire gas stove. It is better to use fechral ones, as they are more flexible, but nichrome ones are cheaper.
Device for melting aluminum and copper
Low-melting metals are brittle. It is important to follow the work schemes with this type of metals.
For example, to melt copper or aluminum, the muffle furnace must be heated up to 1083, and for melting bronze – 930 Celsius.
These materials have the highest melting point among other low-melting materials.
This means that the conclusion suggests itself: to work with low-melting metals, a furnace that heats up to a maximum is required. up to 1100 degrees.
Nuance! For large castings when working with low-melting metals, a furnace is installed. And the metal can be melted in a container with a "spout" (crucible). This is the easiest way to give it shape later.
Stages of working with low-melting materials
- Calcination of the furnace for pouring at temperature 600 degrees.
- Immersion of form.
- Heating the temperature to 900 degrees.
- We record the time the mold spends in the oven – 120 minutes.
- We take out the form and cool it down until 500 degrees.
- The low-melting material is placed into the mold.
Melting gold
Refractory metals, such as gold, are characterized by a high melting point in work. So, to successfully solve the problem, it will be necessary preheat oven to 1300 degrees, provided that we are working with steel (for other materials, we need to look at the refractoriness coefficient).
It is necessary to take into account factor of kindling materials. Thus, you can heat the stove with all unnecessary household materials, excluding toxic ones, that is, those that emit poisonous substances during combustion.

Stages of working with refractory materials
- Calcination of the furnace for pouring at temperature 900 degrees.
- Immersion of form.
- Heating temperature up to 110 degrees.
- We record the time the mold spends in the oven – 150 minutes.
- We take out the form and cool it down until 800 degrees.
- The refractory material is placed in a mold.
DIY Induction Muffle Furnace
Muffle furnaces are a necessary design for the creativity of jewelers, blacksmiths, other masters working with ceramics, with steel hardening. Usually an induction muffle furnace for melting is expensive, but it is possible to make it yourself.
Necessary materials and tools
- 6 fireclay bricks, refractory.
- Heat-resistant silicone.
- Bolts and nuts.
- Steel not less than 2 mm.
- Small diameter tube, steel.
- Drill.
- Metal nippers.
- Drills of various diameters.
- Welding accessories.
Manufacturing of the structure
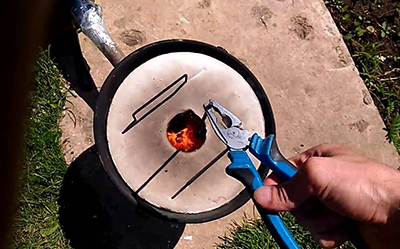
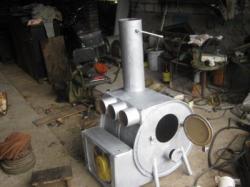
- Installation of the main part. We cut transverse holes on the inner sides of the fireclay bricks. They are used to install the heating coil. Such grooves increase the volume of the furnace, that is, the internal space, which is more efficient to work with. We stack the bricks and fix them in the shape of a prism. We eliminate the cracks.
- Manufacturing of walls. Materials used: kanthal, fechral, nichrome. The materials can be installed in absolutely any way, but it is better to lay them in a circle. This way, there will be no temperature differences, which negatively affect the heat treatment process.

Photo 2. The main part of the muffle furnace is assembled from fireclay bricks, in which holes are cut out.
- Installation of thermal insulation. Efficiency depends on the degree of temperature retention inside the structure. The thermal insulation itself is a mixture, consisting of 0.8 parts cement and 0.2 parts perliteThe mixture between the prism and the walls should be left to stand for about 48 hours.
- Making the bottom. We create a curved blank for the lower part of the product, attach four small pieces of steel pipe - these are the legs on which the stove will rest. We pour a cement mixture inside the product, after hardening we apply wire in the form of a grid to create an even and uniform layer. At the end we apply talc.
- Making the lid. We create a blank of the same size as the bottom, attach handles to it. We fill the lid with a solution of cement and poured over.
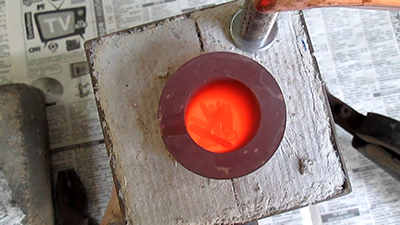
- Making a spiral. Nichrome wire with a cross section of 0.1 cm and an iron rod with a radius 3 mm. After removing the wire from the rod, we get a spiral. The turns should not touch. The finished spiral is placed in the slots made at the first stages of production.
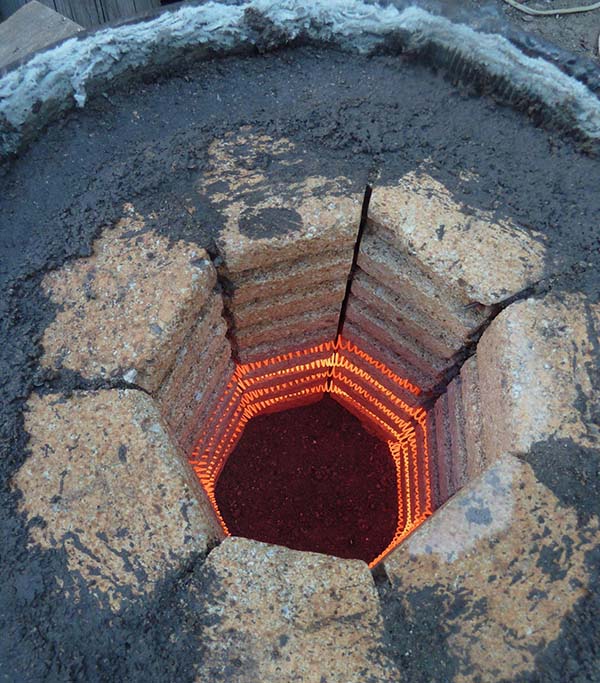
Photo 3. A spiral of nichrome wire is placed in special slots in firebricks so that the turns do not touch.
- Assembly and drying of the oven. We assemble all the elements of the oven, install them and dry them. The product should be dried in a well-blown and ventilated place. The use of heating devices during the drying process is strictly prohibited.
Attention! The process of creation requires pharmaceutical precision keep all proportions, specified above. Work accurately, meticulously, carefully with each material, check it for defects. The main difficulty is the fundamental implementation of instructions.
Useful video
A video clip that presents one of the options for creating a muffle structure for metal hardening.
Muffle furnace – a universal assistant
A muffle furnace is a device that will make life easier for those who work with metals. This is a virtually irreplaceable tool. Today, modern muffle devices are expensive equipment, with their own nuances, complexities and features.
It is easier to do it yourself, thereby protecting yourself from factory defects, understanding the production technology, and gaining new experience necessary for development.


Comments
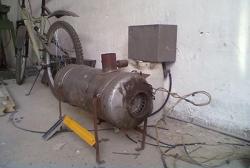
The body is made from an iron water tank. I made markings and cut the body into 2 parts. One went to the base, and the other to the door and back wall. Then I welded 15th corners to weld the back wall to the body thoroughly. Before that, 2 holes were drilled in the corner. A total of 8 corners, 4 on each side.
Thermal insulation is fireclay brick, which can withstand temperatures of 800 degrees. For cracks, I used asbestos. I leveled the surface with a regular cloth. Then I covered the entire body with bricks and began to adjust it to avoid cracks and gaps. I sealed the cracks from the inside with fireclay.
Then I installed the spirals (8 pcs) Marked the grooves and cut the bases quite quickly (8 grooves, 2 on each side) Insulation from contact with the body. After the manipulations were carried out, I tightened the structure with nuts, welded the door for opening and the clasp. Connected it to the voltage control unit and EVERYTHING is ready!