Now the garden plot will become a favorite place for recreation! How to build an outdoor oven for a summer house with your own hands?
For those who prefer cooking outdoors, an outdoor oven is the best option. Food cooked over an open fire tasty and healthy.
Build a stove structure you can do it yourself, without resorting to the services of expensive craftsmen.
Content
Types of outdoor stoves for summer cottages
To choose the best option for an outdoor stove It is important to decide on the range of food that will be cooked on it. Some allow you to bake bread, others - fry meat and fish, and some models are practically 100% replaces the kitchen stoveThe most popular types of stoves are:

- Russian stove.
This type of stove is similar to the one that was installed in houses in the old days. However, in outdoor models insulate the side walls. This reduces fuel consumption and allows heat to be retained longer.
In addition, unlike the traditional Russian stove, the lower part of the firebox, where the firewood is placed, is installed strictly horizontally to the surface of the ground.
This universal option, which can replace a stove in the kitchen, as its functionality is almost limitless. With the help of the device, you can boil, fry, stew and even bake bread or pizza. Many models are equipped with an additional holder for a cauldron to cook oriental dishes. The only downside of the stove - the impossibility of smoking products.
- Fireplace.
Essentially, an outdoor fireplace is a type of barbecue with a grill. Its functionality is limited to cooking meat and fish. But this option has an advantage over the Russian stove: to install the device you will need very little space. This is an ideal choice for small garden plots.
- Tandoor.
Fans of Asian cuisine will love the tandoor. This type of oven has a truncated firebox, on top of which there is a hood with a small door where firewood is placed. Unlike traditional ovens, in this type of oven The structures are equipped with a special pipe for smoke to escape.
In the tandoor, they cook fried and smoked meat, fish, vegetables, and dishes in a cauldron. In addition, they bake lavash and flatbreads in it. The former are made on a tray or cauldron installed over the neck. The latter, sprinkled with water, are stuck to the walls of the device.
Furnace designs and sizes
The design and size of an outdoor stove depends on its type.
Russian
This option has the most complex design, which consists of the following parts:
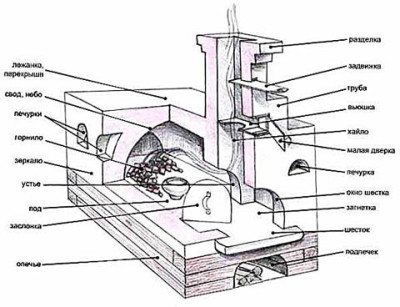
- Opechek — a cavity intended for storing firewood.
- The stove — a recess for drying fuel.
- Shestok — a platform in front of the firebox for placing dishes before placing them in the oven or after cooking.
- Under — the lower surface of the cooking chamber.
- Fuel tank — a cavity where firewood is placed.
- Overtube - a place for collecting smoke from the firebox, which goes into the chimney.
- Dushnick - a small window that serves as a place for smoke to escape. It also leads directly to the chimney.
- Loach — a damper for completely blocking the chimney. Inside there is a second damper that controls the draft of the stove.
- Sunbed — the space above the firebox, which is used as a sleeping area or for storing kitchen utensils.
The external dimensions of the oven may vary and are selected in accordance with the wishes of the homeowner and the size of the plot, on which the structure will be erected. In addition, it is necessary to take into account the length of the lounger and the presence of additional functional features, for example, a recess for a cauldron, etc.
The depth of the foundation depends on the external dimensions of the furnace and the characteristics of the soil, but cannot be less than 50 cmThere are established standards for cast iron structural elements.
| Name | Size in cm | Quantity in pcs. | |
| Door | Firebox | 20x20.5 | 2 |
| - | Blowing | 25x14 | 2 |
| - | Ventilation | Arbitrary | 1 |
| Lattice | Grate | 38x25 | 1 |
| Gate valve | 26x26 | 1 | |
| 18x14 | 1 | ||
| 14x14 | 1 | ||
| Loach | 23 | 1 | |
| Damper | Fuel tank | 45x38 | 1 |
| Water heating box | 50x12x28 | 1 | |
| Two-burner hob | 40x70 | 1 | |
| Steel rods | 100x5x1.2 | 1 | |
| 143x2.5x0.2 | 1 | ||
Fireplace
When building an outdoor fireplace stove, draft is not calculated, since the device is not intended for heating. To organize proper smoke exhaust, you only need to comply with the established standards for fireplace pipes. Cross-sectional area should not be less than 12% from the diameter of the fuel inlet.
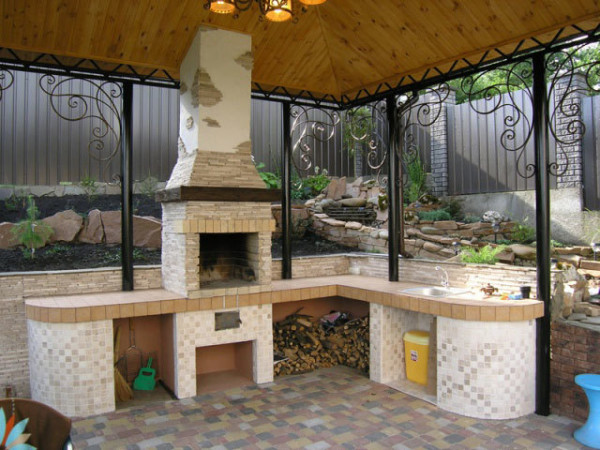
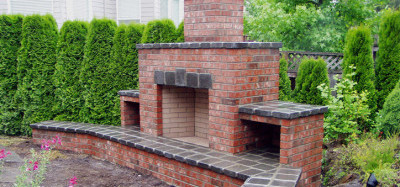
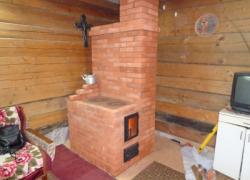
Photo 1. Outdoor brick fireplace stove. Installed under the roof of the gazebo, additionally has countertops and a sink.
The external dimensions of the fireplace depend on the wishes of the homeowner, but when laying the foundation it is made 50 cm larger than the future oven. Foundation depth — from 40 cm and moreFor construction you will need:
| Name | Size | Size | Quantity |
| Concrete slabs | 75x50x5 | cm | 5 |
| 50x50x5 | cm | 2 | |
| Aerated concrete blocks | 65x40x10 | cm | 3 |
| Fireclay slab for firebox | Depends on the desired size of the firebox | 1 | |
| Copper sheet | 1 (thickness) | mm | 1 |
| Brass corner | 20x20x2 | mm | 1 |
| Mineral fiber board | 120x60x1.9 | cm | 1 |
| Brass rod | Arbitrary | 1 | |
| Galvanized steel brackets | 15x15x0.5 | cm | 10 |
| Facing brick | 230x114x65 or 250x120x65 | mm | Depends on the external dimensions of the fireplace |
| Clinker slabs | 20x20 | cm | 20 |
| Square section rod | 8x8 | mm | 1 |
Tandoor
The tandoor has a round shape, so the foundation is made the same. Since this is the lightest version of an outdoor oven, its depth can be from 20 cm.
The exact value is calculated taking into account the characteristics of the soil.
The optimal height of the tandoor is 100 cm.
The lower diameter can be increased at the owner’s discretion, but the ideal parameters are from 60 to 80 cm.
The upper part of the structure is narrowed to the size from 40 to 60 cm.
Important! The narrowing value is indicated taking into account the optimal diameter of the tandoor - 60—80 cm.
When laying the first tier of the stove, ash-pit. This can be a removable brick or a damper. The ash pan is designed to supply air when igniting fuel or increasing the temperature inside the stove.
How to build a country stove on the street with your own hands
If you want to build a stove yourself, you should choose a project without complex vaulted masonry. It is easy to do it yourself without the help of a professional stove maker.
Selecting a project
Having decided on the design, you need to order a project of the future stove. It is extremely difficult to make it yourself, since it is necessary to calculate the draft and correct smoke removal.
Attention! Only an experienced craftsman can make the right project. The quality of the project the durability of the structure depends.
Materials
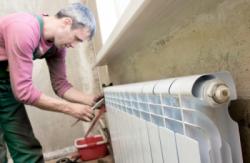
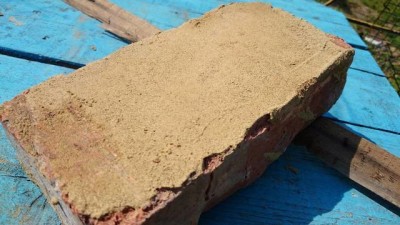
To build an outdoor stove, you will need heat-resistant bricks that can withstand the temperature conditions. up to 1000 ᴼC.
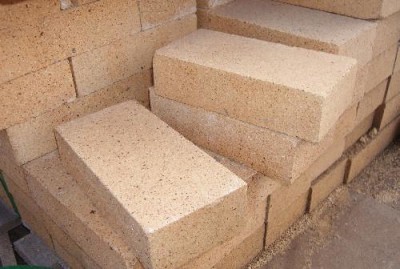
The material comes in two sizes: 230x114x65 and 250x120x65 cm. The following types of bricks can be used:
- fireclay;
- red;
- decorative;
- fireproof stove brick.
The amount of brick depends on the external dimensions of the structure.
For example, on average, it will take to build a Russian stove from 2500 to 3500 pieces.
Important! The mortar consumption depends on the quality of the brick. If used brick is used, it should be clean thoroughly.
Solution
The main task of the solution for laying the stove is high-quality adhesion of bricks. At the same time, it should not crumble under strong temperature changes. The easiest option is to choose special solution for laying fireplaces. However, you can make it yourself. To do this you will need:
- clay;
- sand;
- water.
Sift solid materials before use to remove large foreign particles. First, prepare the clay. Lay it in a layer in 15 cm and fill with water so that it completely covers the surface. After this, leave the finished mixture for a day, and then add sand.
The amount of sand depends on the quality of the clay, its viscosity and fat content. The optimal ratio of clay and sand determined empirically.
To do this, after mixing clay dissolved in water with sand, two bricks are bonded together and left to dry.
Then, using any metal object, such as a trowel, try to pick out the solution. If no cracks appear on it, then the ratio is chosen correctly, otherwise, repeat the procedure again. until the ideal ratio of sand to clay is determined.
Reference. The three lower tiers of a Russian stove and fireplace can be made of overheated bricks, since these layers are not subject to heating. However, in a Russian stove this is possible only if there is no bottom heating.
Preparing the site
Having determined the purpose and type of outdoor stove You need to choose a place for construction. It should be an open area, with no trees growing nearby and no outbuildings made of flammable materials. Its size should be larger than the selected stove.
Important! If an outdoor stove is installed near a house, then it is necessary to take into account which direction the wind blows most often, to prevent smoke from entering living quarters.
Construction stages
- Pouring the foundation.
First of all, dig a hole with a flat bottom surface. Its diameter should be larger than the stove by 15-50 cm. The pit is filled with concrete and reinforced. Depending on the depth of the foundation, it will take from 1 to 3 weeks.
- Construction of walls.
The walls are erected according to the order specified in the project. Each row is checked for evenness with a level. The correctness of the corners is checked with a plumb line.
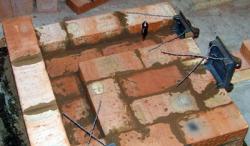
- Installation of cast iron elements.
When installing the hob, firebox, doors and dampers, each of them should be lined with basalt wool and carefully wrapped with asbestos-cement cord. This is necessary so that the metal elements do not expand when heated and do not press on the brick.
- Chimney.
The quality of smoke removal is the most important element in the construction of any stove. It is better to use a system of modules, in which the chimney is assembled like a constructor, and then lined with bricks on the outside. At the joints, the models are fastened with clamps and heat-resistant sealant.
- Decorating.
After completing the main stage, you can begin decorating the outdoor stove. It is important to choose the right plaster. It should be heat-resistant and not crumble. If desired, the brickwork is decorated with artificial stone.
Difficulties and errors when laying the device
The most common errors during installation are:
- Too much severe narrowing of the smoke channel. This reduces the traction and combustion rate of the fuel.
- Lack of inspection of the internal walls of the furnace for smoothness. Due to unevenness, soot accumulates on the walls. This causes rapid clogging of the chimney.
- Using plaster for interior surfaces stoves. Even types of this material that are resistant to temperature changes will burn out in a matter of minutes.
- Absence of asbestos-cement cord during installation firebox door, grate and other cast iron elements. Such cord performs the function of a thermal gap. Its size should not be less than 0.5 cm around the entire perimeter of the installation.
- Use of low-quality asbestos-cement cord. To purchase quality material, you need to test it for flammability directly in the store.
- Installation of an oven end-to-end with a fireboxThis will reduce the uniformity of heating, which will cause food to burn.
- Using pipes made of galvanized metal for the manufacture of a chimneyThe durability of non-galvanized metal is several times higher, while galvanized elements quickly burn out.
Photos of finished projects
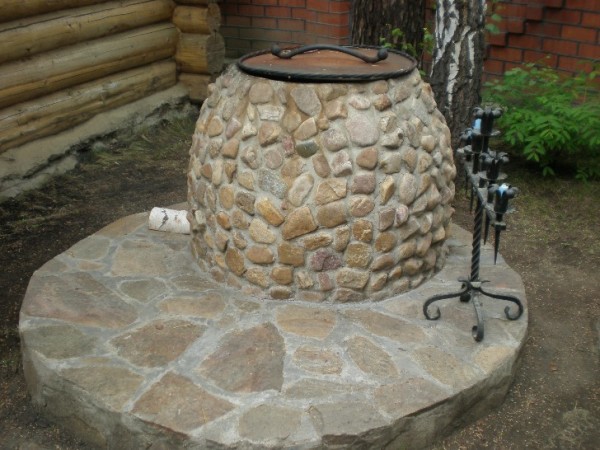
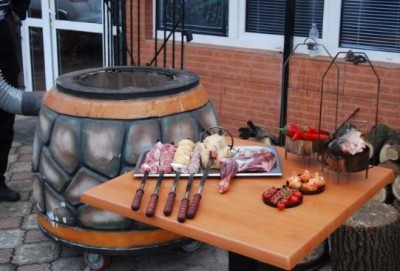
Photo 2. Outdoor tandoor oven. The device is located on a pedestal, lined with decorative stone.
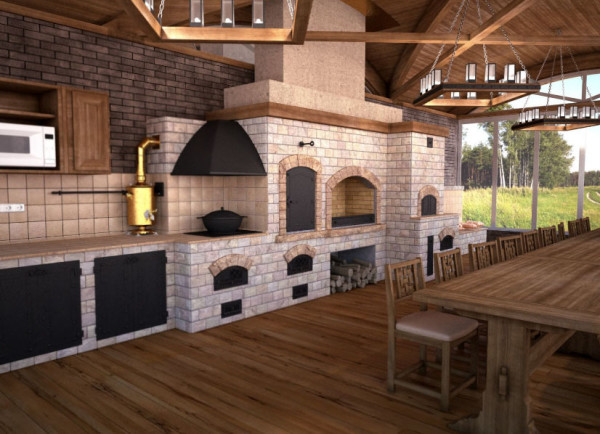
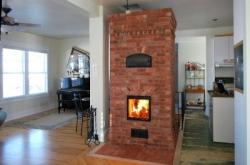
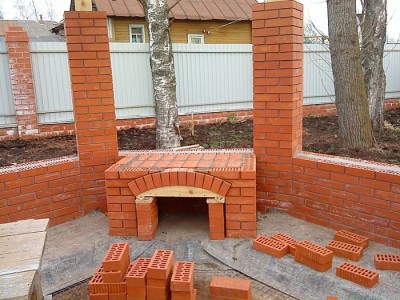
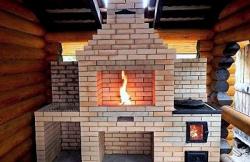
Photo 3. Outdoor stove-fireplace installed in the summer kitchen. The device has a built-in barbecue, hob, oven.
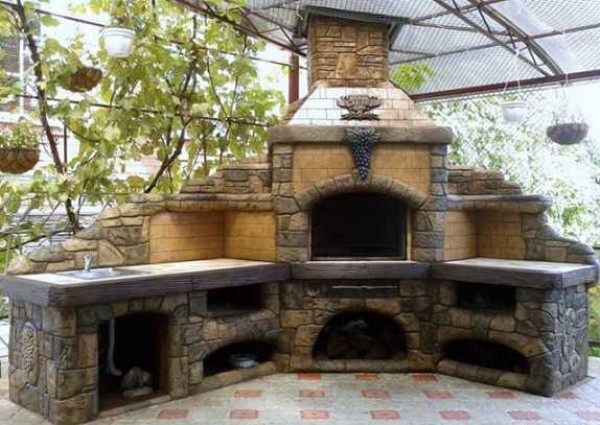
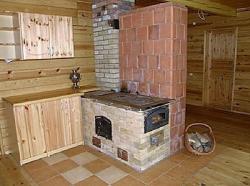
Photo 4. A fireplace stove installed outside. The device is skillfully faced with decorative stone.
Useful video
Watch a video that shows the process of building an outdoor barbecue oven in a slideshow.
How long does it take to build a summer oven?
Outdoor stoves made in strict accordance with the project, will last for decades. The main thing is to choose the right materials and monitor the evenness of the masonry. You can install a canopy over the structure, turning it into a multifunctional summer kitchen.
It is important to carry out a test firing no earlier than 3 weeks after completion of the work. The total construction time depends on the owner's capabilities and the size of the furnace. On average, it will take about one and a half months.
Comments