Let's make a Russian stove a work of art: DIY finishing of the device
High-quality finishing of a Russian stove involves the use of traditional and modern materials.
The cladding must be moisture-resistant, non-flammable, heat-resistant, resistant to a significant increase in the volume of the furnace when heated.
On properly plastered, painted, tiled stove walls, no cracks, dents, stains or other defects appear.
Content
Methods of finishing a Russian brick stove with your own hands
The Russian stove is rarely left unfinished. The simplest option for finishing works includes plastering and whitewashing the walls. They are sometimes hand-painted with gouache, acrylic or watercolor. The stove is decorated with several types of tiles and painted with heat-resistant paint.
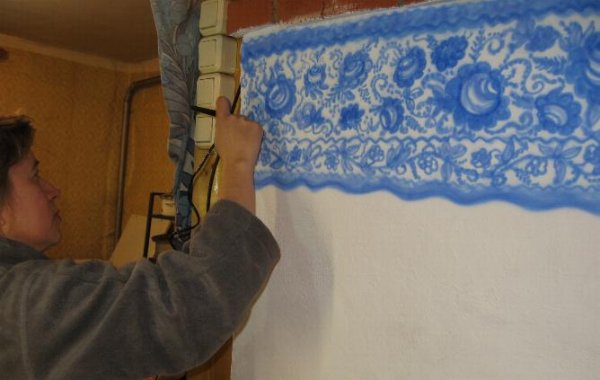
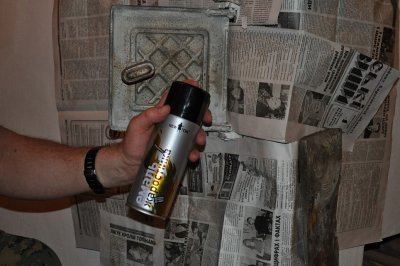
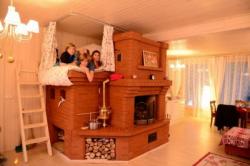
Photo 1. Applying an ornament using gouache to a Russian stove, which was previously plastered and whitewashed.
Plaster
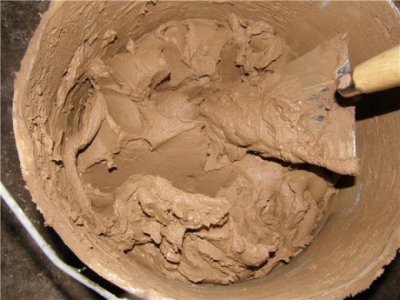
Plastering the walls of a Russian stove — budget finishing option. Its advantages are the cheapness of the materials and their availability. The solution, which the stove-makers prepare themselves, includes several ingredients. The components are mixed and diluted with water to the desired thickness.
The solution contains::
- clay and sand;
- fireclay sand and fireclay clay.
Reference. To increase the strength of the plaster, cement, fluff, and powder are included in the mixture. asbestos fiber, slaked lime, heat-resistant glue, salt.
Clays are divided into fatty (very viscous, plastic), normal and skinny (not plastic, saturated with coarse particles). For the preparation of the solution, the best are fat and normal clays. Sand is added to the former, and the latter can be used for plastering undiluted.
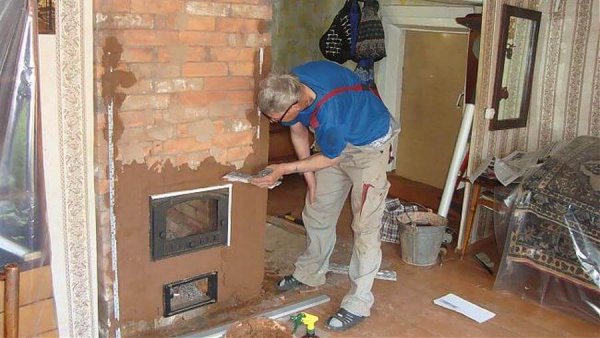
Photo 2. The process of plastering a Russian stove with Dutch order using clay mortar.
Normal clays contain the optimal amount of granular material and are an ideal natural mixture for stove work. Lean clays are also used, but the required amount of fat clay is added to them.
Important! To apply the first layer of plaster, the solution is made the same thickness as for masonry. It does not flow on the brick wall and is well fixed on the bricks and seams. The second (outer) layer is made of a more liquid solution.
Whitewash
To whitewash a plastered stove, use slaked lime and chalkThese materials are pure white in colour and are easy to apply to plaster.
Slaked lime sold in powder form, packaged in sealed plastic bags.
The material is poured into a container, filled with water and mixed with a spatula. The ratio of water and lime is not strictly specified.
You can dilute a thick mass, the consistency of which resembles toothpaste, and then dilute it with water as needed.
Lime is often added salt. This substance gives strength to the solution. The stove wall will not crumble and dust. If you accidentally lean against a stove whitewashed with salt, there will be no white marks on your clothes. The salt will give the wall of the appliance a shine. Construction paints are also added to the lime mortar.
Lime is considered a safe material, but it corrodes the skin when in close contact. That is why whitewashing is carried out in rubber gloves.
Chalk It is applied well to plaster. The surface whitewashed with chalk solution "smears" hands and clothes when touched. To increase the strength of whitewash, add to the chalk solution shredded laundry soap, liquid wood glue, skim cow's milkConstruction paints are added to the solution in the same way as to lime.
What can be used for painting, how to apply paint
The stove is painted over the plaster and over the unplastered brick. Several types of paint are suitable for finishing work:
- water-based;
- organic;
- organosilicon;
- silicate-organic.
All the listed paints have common properties. They are waterproof, heat-resistant, do not get wet from moisture.
The paint is applied with a brush, roller, or construction sprayer. To ensure a durable layer, painting is done twice. Hard-to-reach areas are painted with brushes of different widths.
Important! They only paint completely dry plaster or brickwork.


What kind of tiles to use for a stove in a house
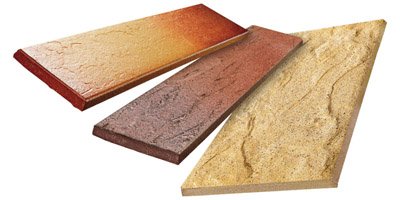
A Russian stove can be decorated with any tiles, this will improve the appearance of the heating structure and allow it to fit harmoniously into the interior of a modern home. Three types of tiles are most often used: terracotta, clinker and majolica.
Reference. The tiles are used for continuous cladding and for creating decorative compositions on whitewashed or painted walls of a Russian stove.
Terracotta tiles is produced from kaolin clayThis is a heat-resistant material that, when heated, retains the heat of the stove for a long time.
For facing stoves, rectangular tiles are produced, the dimensions of which correspond to the dimensions of the stove bricks, this helps to create an imitation of brickwork.
The color palette of terracotta tiles is warm, dominated by brownish, orange, and cream tones.
Clinker tiles - finishing material of various grades shale clay. Dyes give the clay a variety of shades. This tile is durable, heat-resistant, and remains warm for a long time after heating.
Majolica - ceramic tiles covered heat-resistant enamel (glaze)). The glaze is decorated with ornaments and drawings. This is a very beautiful material that will make even the simplest Russian stove unique. Depending on the style of painting, it is called Gzhel, Metlakh, Egyptian tiles.
Selecting a cladding method
Materials for facing and whitewashing the stove are selected in accordance with the design of the device and the style of the interior. The choice of finishing options is influenced by:
- cost of basic and auxiliary materials;
- cost of stove-maker services;
- individual preferences of the home owners.
If the baking vault and the hob play a decorative role and are practically not used, you can choose any type of finishingIf the external cladding will be constantly subjected to mechanical loads and periodically become covered with soot, it is reasonable to opt for cladding that is easy to clean or restore.
Necessary tools
To apply the plaster solution you will need: special tools:
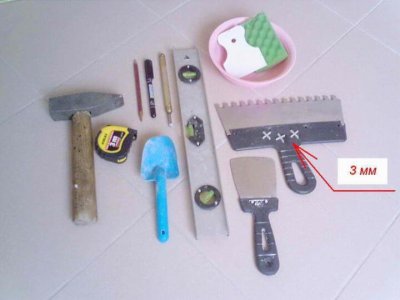
- spatula;
- a square plastering trowel or a construction trowel;
- metal iron;
- aluminum rule;
- corner alignment tool;
- graters, half-graters;
- building level;
- plastering trowel;
- hammer with a pick and a flat end;
- scoop.
To dilute the solution, you will need a container. Suitable for mixing the paste spatula made of plastic, wood, metal.
Preparation of materials
The solution is prepared immediately before plastering workIf the stove-maker uses ordinary clay from a quarry, it is soakedand a day. Fireclay is filled with water for a period of time. up to one and a half days.
The sand is washed in running water. Only fine material with a particle diameter of 0.15 cm and lessThe ratio of sand and clay in the solution is determined empirically and ranges from 2:1 to 5:1 and depends on the quality of the clay.
- Cement and lime are added in small quantities - no more. one to two kilograms per three-bucket bucket solution.
- Heat-resistant glue is added according to the manufacturer's instructions (900-1000 grams for the same volume of solution).
- If asbestos fiber is introduced into the mixture, it is enough to take 100-150 grams product.
Important! A normal solution, when applied to a trowel, does not slip off the tool when it is tilted 45 degrees.
They sell it in construction stores ready mixes for plastering stoves. They contain clay, sand, lime, heat-resistant adhesives, plasticizers that increase the strength of the plaster. The solution is made from factory mixtures according to the manufacturer's instructionsIf all requirements are met, the result will be a paste of normal composition and optimal viscosity.
How to calculate the amount of materials
Amount of solution for plastering a Russian stove is calculated in the same way as for walls. In calculations the surface area of the stove and the thickness of the plaster are taken into account:
- We multiply the thickness of the plaster by the surface area, and as a result we get the volume of the solution.
- We multiply the volume by the specific gravity of the clay-sand paste and obtain the weight of the solution for a given furnace area.
For example, for a wall of size 1.5x1.35 meters will be needed 36.5 kilograms solution (with the thickness of the plaster 10 mm). To speed up calculations, stove makers use a plaster calculator on the Internet.
Number of tiles calculated after measuring the surface area of the stove. When purchasing the material, take into account that in some places you will have to glue not whole tiles, but their parts.
Preparation for work
Bake they heat it up in advance, so that its surface is not overcooled. Preparation of brickwork includes the following steps:
Step 1. Cleaning from unevenness and dirt with the help of a tool. During the process of laying the stove, drops and mortar streaks remain on the walls. Bricks show irregularities, sometimes caverns. To clean the oven from the remaining solution, use:
- spatula;
- bit;
- furnace hammer with a pick;
- trowel;
- a concrete grinding disc mounted on a grinder, or a diamond cup.
The wall is being leveled, scraping and knocking the mortar off the bricks with a spatula, chisel, hammer. A good result is achieved by leveling the wall with a crown, put on a grinder or a diamond cup.

Diamond bowl fixed in a special holder, it rotates at high speed and perfectly aligns the wall.
The diamond disk is passed along the wall, which not only clears away any remaining mortar, but also evens out even the smallest protrusions and burrs on the bricks.
Step 2. Cleaning the seams from excess solution. Before plastering, the seams are cleaned by making a recess up to 1 cm deep in them. For the work, you will need a small spatula, a chisel, and a stove hammer. By pressing on the spatula, the stove-maker moves it along the seam, the solution crumbles and falls out. A chisel and a hammer are used periodically.
Reference. Some stove-makers make a special device in the form of an iron tube cut along its length to deepen raw seams.
Step 3. Cleaning the stove masonry from dust using a wide whitewash brush. The brush is used to sweep the entire brickwork, going from the ceiling to the floor. Some craftsmen use it to clean the walls. vacuum cleaner, which removes dust much better than a brush.
Step 4. Installing the grid. For additional strength, the wall is reinforced grid (made of metal or fiberglass). The diameter of the mesh cells is up to 2 cmThe metal mesh is strengthened as follows:
- Steel screws are screwed into the masonry joints.
- A mesh is installed on the wall and tied (screwed) to screws in several places.
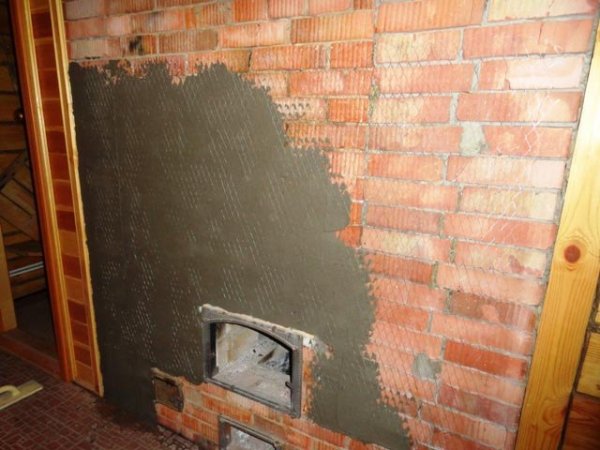
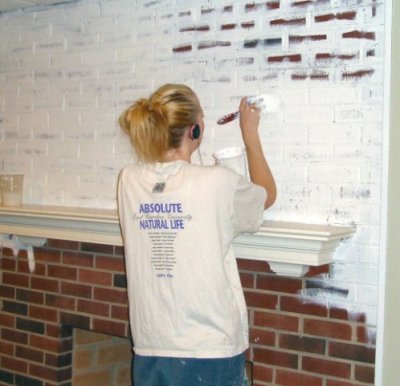
Photo 3. The process of plastering a Russian brick stove: a metal mesh is installed on the wall, and a layer of plaster is applied on top of it.
The fiberglass mesh is attached by tying it to screws screwed into the wall. You can "glue" this element on the first layer of plaster (without fastening with screws), and then cover it with a second layer.
Step 5. Installing corners. Heat-resistant glue or mortar is used to glue the corners of the stove. aluminum corner profileProfiles can be solid or perforated.
Step 6. Installing the beacon strips. If the wall is not even and the thickness of the plaster has to be adjusted, plaster is attached to the wall beacons made of metal profile. The beacons show how much the plastered surface deviates from the vertical. After plastering the walls, the beacon strips are carefully removed, and the places where they were installed are leveled with a float, using a small amount of mortar.
Reference. Installation of mesh, metal corners and use of beacons are not mandatory. when finishing small stoves.
The cladding process
If the solution contains fast-setting components, it is prepared immediately before useIf the solution does not include such ingredients, it can be made in advance and stored in a hermetically sealed container. Plastering includes the following steps:
- Surface of the oven moisten with water from a spray bottle.
- Portions of the solution are taken with a wide spatula and applied (or thrown) onto the wall.
- Using a wide float, smooth the solution over the wall. Move the float from bottom to top, parallel to the floor.
- The procedure is repeated, until the entire wall is covered with plaster.
- Using a corner straightener, float, or other tool align the corners.
- Wall leave to dry for half an hour And proceed to apply the second layer.
- Solution dilute a little with waterto make it more flexible.
- Solution applied (thrown) onto the wall with a spatula.
- Using a wide grater and a ruler the surface is leveled.
- Angles finally leveled using a corner straightener and a float.
Tiling is carried out using ready-made mixtures or clay mortar with cement. To apply the mortar, you need a trowel, spatulas, a hammer, and a grinder for cutting tiles. Working with terracotta tiles involves the following steps:
- Brickwork moisten with water from a spray bottle.
- On the wall with a brush apply primer (Premium or other).
- On the wall with a trowel, wide spatula apply the solution.
- The mixture is leveled with a float. The layer thickness is 4-5 mm.
- Tile from the back side they are coated with a solution and glued to the wall.
- Between the tiles install plastic dividers.
- After the solution has set, The dividers are removed.
They are introduced into the seams heat-resistant mastic or clay mortar with glueA special syringe is used for this.
Attention! Plastering and tiling are carried out at a temperature not lower than plus 5 degrees and not higher 25 degrees.
Difficulties and problems
If the oven heats up unevenly, then firmly glued facing tiles may crack, and loosely fixed tiles may fall off. The problem will be solved if the tiles are fixed on lining brick, laid out on the main masonry for uniform heating.
Large tiles are particularly susceptible to cracking. That is why they are glued only in evenly heated areas.
Difficulties often arise when plastering. It is not always possible to make a solution that is resistant to cracking on your own. The problem will be solved if you buy a factory mix and follow the instructions for mixing the solution.
Why do you need to finish your stove?
Russian stove covered with plaster, whitewash or facing tiles, looks beautiful. Finishing protects masonry from destruction. The mortar between the bricks cracks and crumbles less. A stove lined with tiles or covered with plaster gets an additional layer capable of retaining heat.
Photos of finished projects
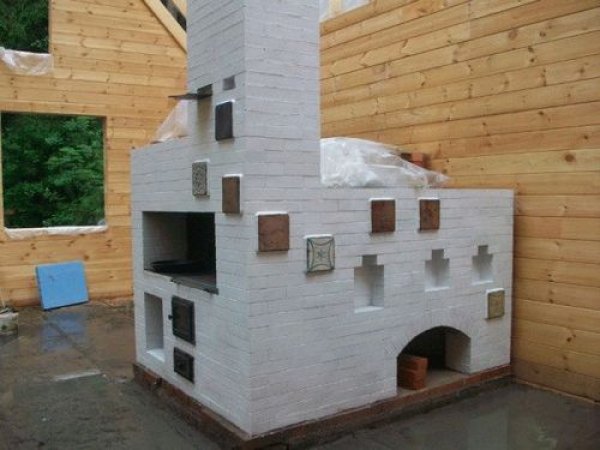
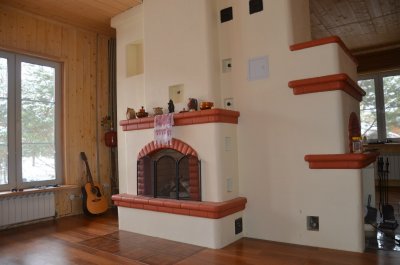
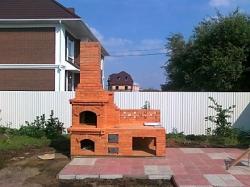
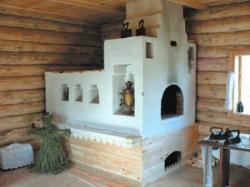
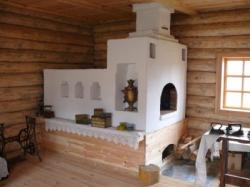
Photo 3. Russian brick stove with whitewash applied to it. Several decorative tiles are also built into the device.
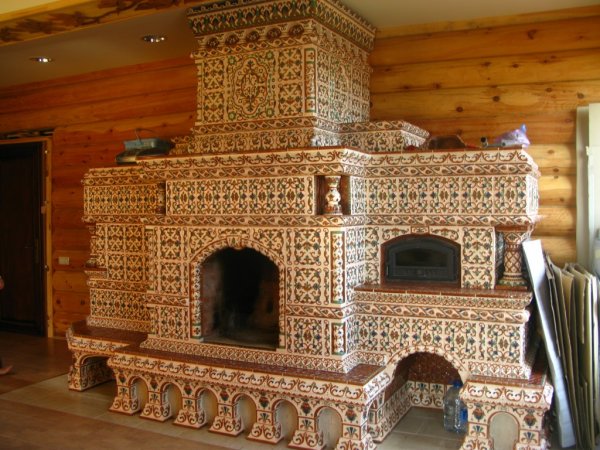
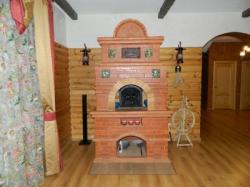
Photo 4. Finishing a Russian brick stove using decorative majolica (tiles covered with enamel and painted with an ornament).
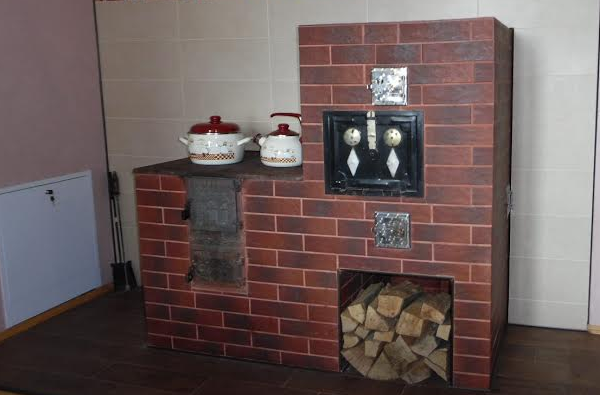
Photo 5. Finishing of a Russian stove using clinker tiles, which resemble bricks in color and size.
Useful video
Watch the video for a detailed explanation of how to tile a brick oven.
Comments
I have come across offers to make tiles for facing fireplaces, but I have not found any tiles for stoves.
Therefore, it is easier and much cheaper to paint the stove with paints. And it is best to do it using paper stencils of painting elements. It will turn out faster and better
The author also for some reason did not mention the old method of finishing the stove surface with tiles. It was tiles that were used to decorate the stoves.