2 approaches to building a brick oven for a cauldron with your own hands: classic or universal

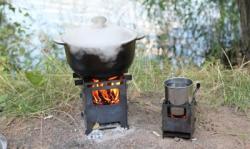
One of the most popular options Cooking on fire is considered to be the use of a cauldron located in a special oven, which has its advantages.
She keeps warm for a long time after warming up, has high efficiency, has the highest possible fire safety.
Content
Types of stoves for cauldrons
Depending on material manufacturing:
- ovens from metal (factory-made and home-made);
- stationary structures made of bricks.
Brick ovens vary depending on depending on the installation method cauldron:
- in classic designs the cauldron fits into the brick recess almost completely;
- in modified versions a cauldron is installed on a specially mounted burner.
Furnaces are also divided by cooking method:
- specialized devices for use with cauldron only;
- universal (multifunctional) devices in which food can be cooked using a cauldron and other devices (for example, a grill for frying meat or a portable hot smoking smokehouse).
The choice of one or another type of design depends on personal preference.
Features of brick stoves
For a brick oven there is two types of schemes - classic and multifunctional or universal.
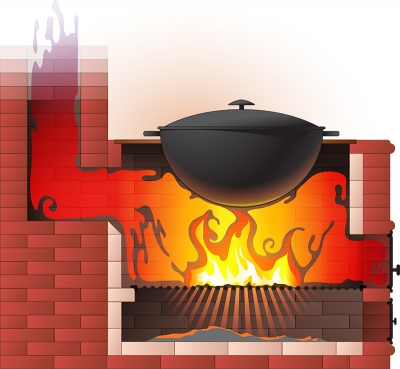
Classical bake looks like this:
- steel plate for fixing the cauldron;
- metal corners for fixing the plate;
- firebox with door;
- ash pit;
- smoke channels and chimney;
- external walls that frame the entire structure to achieve a better thermal insulation effect.
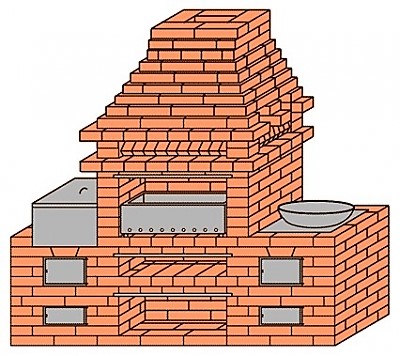
If we are talking about creation universal ovens, its diagram has a number of differences:
- plates for fixing cooking utensils;
- for each device (for example, for a cauldron, a grill for frying meat and a smokehouse) creating your own firebox, because it is necessary to achieve maximum efficiency from each surface;
- In order to unite all the created surfaces into one chimney, it is necessary to erect an arch above them, in which the outlet to the chimney will be made.
The benefits of using a brick structure for a cauldron
Because of large wall thickness for high-quality cooking you will need long term impact on a cauldron of open flame or heat, which is best achieved in a brick oven.
Attention! The design of a cauldron differs from other cooking utensils. the shape of its bottom, as a result of which the walls and bottom are heated evenly when exposed to fire on the cookware.
Among pros using a brick oven:
- high efficiency structures, which is achieved by long-term heat retention in the structure;
- opportunity freely control the temperature cooking food using a relatively small amount of fuel;
- fire safety structures compared to metal analogues;
- probability of creation multifunctional devices in walls of the same structure;
- possibility, if necessary, permanent fixation cauldron in the oven, which will make it easier to use (typical for the classic design).
Once the choice has been made in favor of a brick oven, the period begins preparation and construction buildings.
The main stages of construction with your own hands
Regardless of the purpose for which the brick oven is being built, the entire process will consist of certain stages, each of which maximum attention should be paid, since they all work towards the end result:
- choice project for construction;
- choice places construction (it is directly influenced by the selected project);
- selection of necessary materials and their procurement;
- Preparation tools, which are planned to be used during construction (since it is quite difficult to select the entire range of necessary tools, it is necessary to take this step into a separate stage of preparation for construction);
- construction furnaces from pouring the foundation to the first test firing after finishing work is completed.
Choosing a project: with or without barbecue?
The construction plan is selected depending on whether it is intended to use only the cauldron for cooking or whether it is also intended option for installing other devices for cooking.
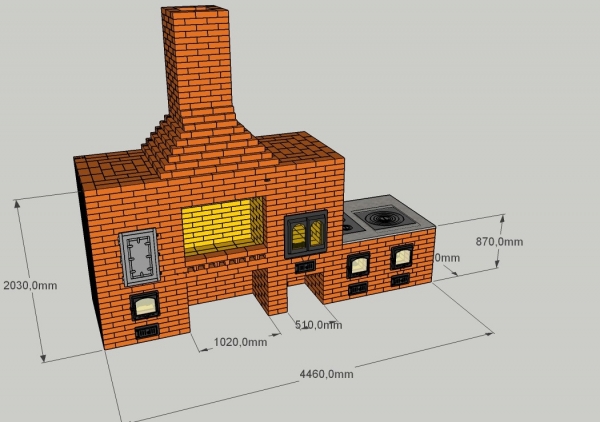
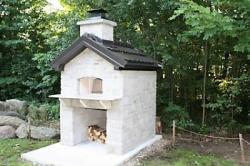
Photo 1. Project of a brick structure with a cauldron, a two-burner stove, a smokehouse and a barbecue area.
The choice is made depending on this. between a classic cauldron oven and a multifunctional design.
| Reasons for comparison | Classic stove | Multifunctional oven |
| Size | It may be relative small, since only the firebox and the recess for installing the cauldron are made. | Quite large design due to the need to provide a large number of special cavities and fastening mechanisms. Due to the peculiarities of the cauldron shape, a separate cavity will be required. |
| Efficiency ovens | The maximum possible. This is achieved by constructing a relatively small firebox, which requires much less fuel to heat. Due to the "recessed" location of the cauldron in the stonework, the required temperature is maintained for a long time. | Below, than in a classic cauldron oven due to the need to create a larger firebox, which will require more effort to heat up. |
| Cooking options | Mainly in a cauldron, but if the cauldron is in a “suspended” state and has access to an open fire, You can use a portable metal smoker and grill rack meat. | You can cook in everything and on everything — you just need to fix the dishes in the most advantageous position to achieve maximum effect. |
| Amount of material | Relatively smallThe main expense will be the purchase of a large quantity of fireclay (refractory) bricks. | Several times more, than for a classic stove due to the larger size of the structure. |
| Place locations | In any corner of the garden, since there is no direct outlet for open fire, which explains the fire safety of the structure. | Only away from flammable objects, as well as in those places where it will be possible to use a large area not only during construction, but also during operation of the furnace. |
Necessary materials and tools
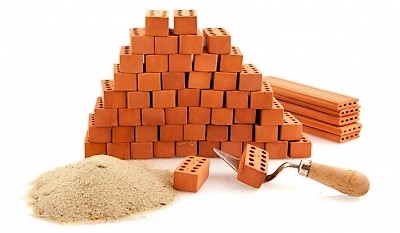
To build a brick oven you will need the following: materials:
- fireclay (refractory) brick for laying the firebox itself and the chamber in which the cauldron and other utensils are fixed;
- fireclay clay for mixing the mortar with which the bricks are bonded;
- thermal insulation (if the stove is decorated with decorative elements that may deform, burn or emit toxic substances when heated);
- facing brick for laying out the outer layer of the furnace;
- cement;
- sand;
- special refractory mixture for mortar (if it is not possible to use fireclay);
- steel corners.
- metal plate (about the thickness of 2 mm) for overlapping;
- steel corners;
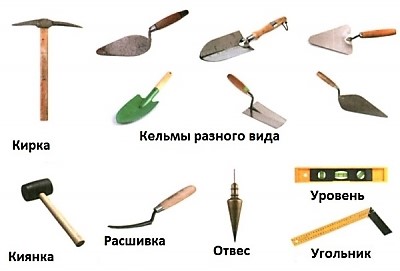
- grate bars;
- doors for the stove.
Necessary tools:
- Bulgarian for cutting bricks and metal elements;
- shovel and buckets for mixing the solution;
- level;
- vertical plumb lines.
Ordering
Let's look at the process of constructing a structure using an example classical ovens (common in the regions of Central Asia):
- Filling foundation. It is made from boards formworkCement or refractory mixture is mixed with sand and water. in a ratio of 1:3 to a plastic state. The formwork is filled with a layer of solution from 50 to 100 mm. From above it is checked with a level to avoid possible deviations of the entire structure. A crosswise reinforcement with gaps approximately 8-10 cm.
- Minimum the height of the masonry will be 6-7 rows (preferably at least 9-11), which it is desirable to perform with dressing to strengthen the structure (first row 1/2 brick, next - from the whole, third — with 1/2 etc.).
- First row becomes the bottom. It is necessary to leave space for the ash pan.
- In the second row A hole is made for cleaning the ash pan and the necessary doors are installed using wire.
- Third The row allows you to begin forming the walls of the furnace and install the grate.
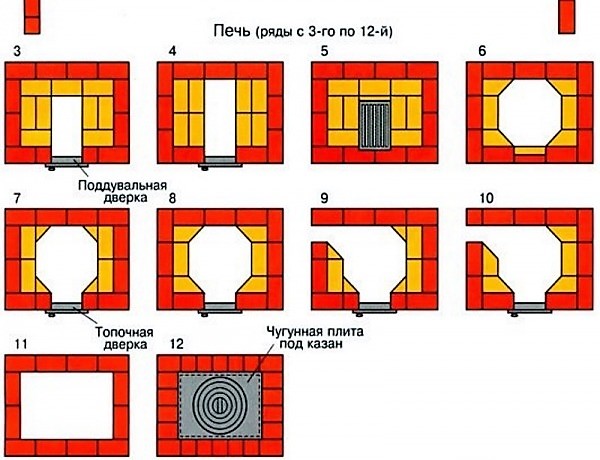
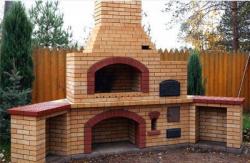
Photo 2. Example of a brick oven row layout for a cauldron. Rows three through twelve are shown.
- In the fourth, in addition to the walls, the beginning of the chimney is erected.
- In the fifth In this row, the laying of the chimney is completed in parallel with the beginning of the laying of the firebox.
- From sixth to eighth The walls of the furnace are laid in rows and the firebox is covered.
- From ninth to eleventh — erect the walls of the furnace.
- Twelfth The row ends with the installation of a metal plate in which a hole is made for the cauldron.
Attention! The vertical and horizontal arrangement of each row should be check with a level and plumb line.
- If flammable materials are used to cover the structure, after drying thermal insulation is being installed.
- It's being done cladding.
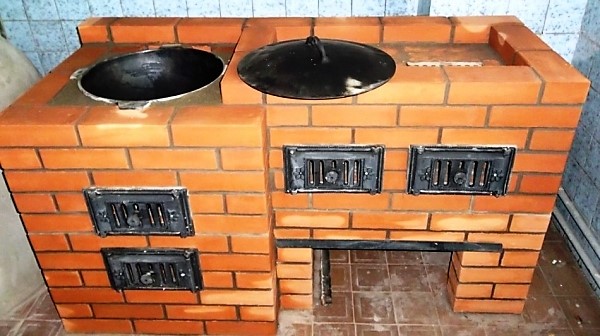
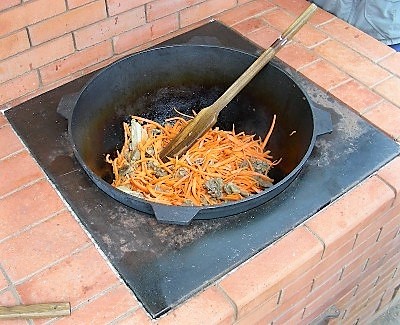
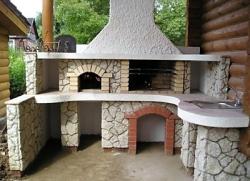
Photo 3. Finished brick oven for a cauldron. Nearby is an additional firebox with a grate for cooking.
Optimal thickness of the solution when laying the stove it will become 8mm gap.
The final step in construction it is test firing, to identify possible masonry errors. It is worth doing it before the start of facing works, since it may be necessary to dismantle the constructed structure to correct the errors made.
If the device is intended for cooking several dishes, then in the project the number of rows and cavities created increases.
Possible complications
When making a brick oven for a cauldron, problems may arise such difficulties:
- Long drying time of the solution due to inconsistency of temperature conditions. The problem is solved by heating the structure.
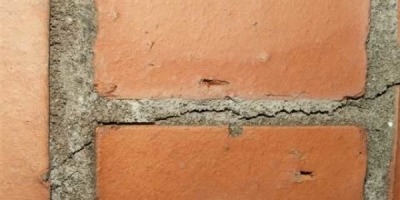
- Shrinkage cracksThey can be avoided only with the correct construction technology.
- Incorrect functioning of smoke channels and chimney due to masonry errors. Corrected by dismantling the structure.
Useful video
Check out the video, which shows the process of building a brick stove for a cauldron with a diagram and ordering.
Instead of a conclusion
A brick oven for a cauldron is not the most complicated design, however, its construction takes quite a long time. If all the basic steps provided by the technology are followed, it will take from two weeks to a monthIf the construction technology was fully observed during the construction of the brick oven, the first heating should be implemented no less than three to four days later after completion of construction.
Comments