Brick Beauty for a Summer Cottage: A Wonderful DIY Barbecue Oven
Brick ovens have been famous for their qualities since ancient times: fire resistance, resistance to temperature changes, anti-corrosion, durability.
Experienced craftsmen recommend building a brick oven for barbecue, as it gives warmth more persistentlye and soft, which helps to cook food well.
This type of design will help to preserve all the valuable qualities in the prepared product and make meat not only tasty, but also soft, tender and healthy.
Content
Types of brick ovens
In every type of brick oven has its own peculiarities in terms of construction and functionality.
Swede
Its features are:
- compactness;
- the presence of shelves for heating food;
- quick heating of the barbecue area.
The laying and ordering of the Swedish bricks implies 32-34 rows. Typically used red fireclay brick.
The first row is laid with special care, since the entire structure depends on its evenness and quality.
Starting from the second row, the fireplace grate holders are installed using welding, then the masonry is carried out taking into account the installation:
- blower;
- ovens;
- chimney;
- fireplace inserts;
- grate;
- firebox doors;
- slabs;
- fireplace shelves;
- doors to the cleaning channel;
- dampers on the fireplace chimney.
It is possible to cover the device tiles or ceramic tiles 2 mm wide.
Barbecue stove E. Gudkova
It has two functions - a barbecue grill and a hob with a burner.
Such a stove is laid out from solid firebrick. In general, the device takes approximately 500 pieces. When laying, take into account:
- place for the stove;
- installation of grilles;
- firebox and ashpit doors.
All stove equipment is installed simultaneously with the masonry work.
Attention! Metal and brick expand to different volumes when heated, so there must be space between them when laying gap up to 5 mm, which can then be filled with asbestos cord.
Dutch
The Dutch oven is distinguished by:
- small in size;
- long-term retention of heat and warmth.
Its long chimneys are built in such a way that so that the heat circulates around the stove for a long timeThis design is heated with coal, firewood and does not accept quickly burning materials: straw, birch bark, sawdust, etc.
This type of device undemanding to the quality of the brick. Fire-resistant, ceramic or fireclay bricks will only be needed for building the firebox.
The rest of the structure's frame may be made from lower-quality building materials.
According to the type of masonry, Dutch ovens are:
- rectangular;
- round;
- oval;
- square.
The masonry can be laid in a checkerboard pattern.
Russian
The design provides not only a stove, but also a place to sleep, so the device is different comparatively large dimensions: 2x3 meters. Besides, his the functions are much broader:
- cooking;
- heating;
- barbecue area;
- place for a saucepan or cauldron, etc.
In order for the stove to be multifunctional, it is necessary to lay it correctly. is carried out taking into account overlaps, which later serve as a storage place for fuel or a shelf for dishes, depending on the stove design.
The layout of the barbecue includes a common brick chimney in the center of the structure, installation of metal plugs, doors and shelves. The design may include a recess for a saucepan or cauldron.
Making a Brick Barbecue Oven with Your Own Hands
Whatever type of oven you choose, the construction principle is approximately the same:
- BBQ project;
- finding a level place for installation;
- foundation device;
- preparation of instruments;
- manufacturing of the frame.
Foundation
The foundation depends on the barbecue oven project. If the oven is simple and small in volume, then it is enough to choose a flat surface, concrete it and start laying out the structure on it. If your project requires a real durable foundation, then It is important to do the following:
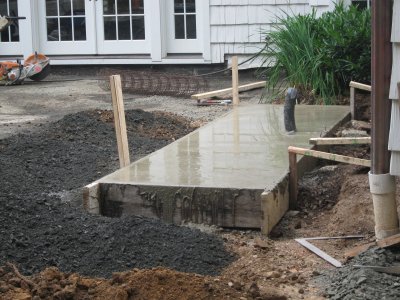
- dig a hole 20 cm deep (the area of the pit must be larger than the area of the base of the planned furnace);
- fill it with sand and gravel;
- tamp down;
- backfill possible 2 layers gravel and sand;
- fill with the prepared solution;
- During the setting of the solution, wet the surface with water to avoid its deformation.
If necessary, a double layer of foundation is made.
For work, prepare tools, starting with a pickaxe and ending with equipment for monitoring the horizontal and vertical levels of the masonry. The components of the future structure should be purchased or manufactured:
- staples;
- gratings;
- corners - external and internal;
- valves;
- wire, etc.
It all depends on the chosen project and the complexity of the barbecue oven.
Construction materials:
- brick;
- clay;
- sand.
Selecting a project, drawings
The oven can be either very simple (U-shaped), and complex multifunctional designIts shape can be rectangular, square, oval or even round.
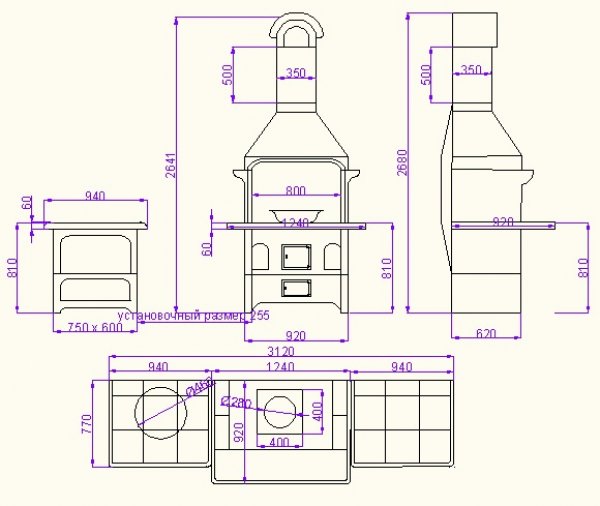
Photo 1. Drawing of a simple brick barbecue oven, front, side and top views. Dimensions of the device are indicated.
The project may include a brick chimney and space for a smokehouse, cauldron, barbecue, etc.
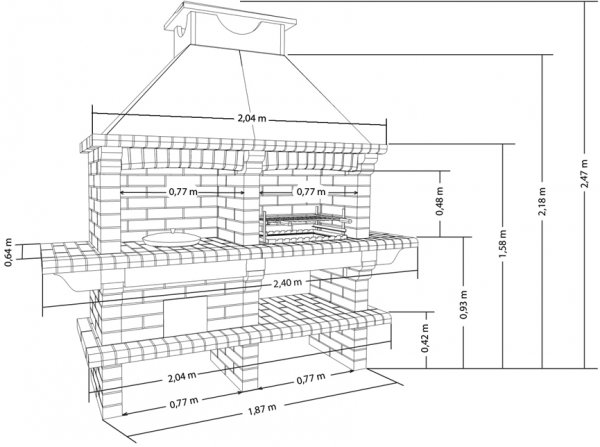
Photo 2. Drawing of a brick oven with barbecue. In addition to the section for cooking on coals, there is a place for a cauldron.
Materials
Depending on the material they are made from, all bricks are divided into the following types:
- ceramic (based on high-quality clay fired in a kiln at a temperature 1000 degrees);
- silicate (based on sand processed under high pressure);
- hyperpressed (based on limestone rocks and Portland cement that have undergone pressing).
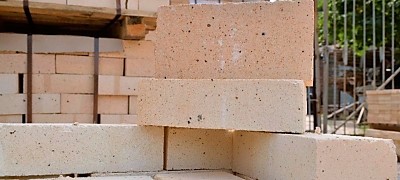
When building a barbecue oven, solid brick is used, which is also called stove brick, its second name is fireclay brick. It has:
- strength;
- insensitivity to high temperatures;
- different colors;
- various shapes, for example, wedge-shaped.
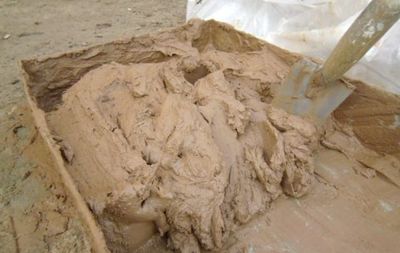
Mortar for masonry
Clay has the property of transformation into the hardest stone after heat treatment. Therefore, the use of clay in the laying of the stove as a binding element is widespread among professional stove makers.
Important! The solution of clay and sand is made with individual proportions depending on the fat content of the clay. There are typical proportions of the solution, assuming the average fat content of the clay: clay-sand-cement-asbestos - 1:1:2:0.1.
Stages of solution preparation:
- soak the clay in a container;
- obtain a homogeneous mass;
- sift the sand;
- add to clay paste solution;
- stir with a shovel;
- If the solution comes off the shovel well, then it is ready.
You can add a little cement or salt to the solution.
This will increase the strength of the future barbecue oven: 200 g salt, 800 g of cement per bucket of solution.
Some people use sand-cement mortar for laying.
The volume of mortar depends on the number of bricks in the structure itself.
The calculation is made taking into account the use 20 liters of mortar for 50 bricks.
Attention! The core of the furnace is laid using mortar made of fireclay and refractory clay in equal parts.
Preparing a place for the stove
Everyone chooses the place for the barbecue themselves. It must meet a number of criteria:
- sufficient area according to the furnace design;
- flat surface;
- sunny side of the site;
- location away from fences, trees and flammable wooden buildings.
When choosing, it is advisable to take into account the fact that smoke from the stove can go to the neighbors depending on the wind direction, and this can be a stressful moment for them.
Ordering, laying the device
In accordance with the diagrams and drawings, the foundation preparation and laying of the barbecue oven row by row begins. The standard design implies 13-17 rows of U-shaped masonry.
Important! Before laying the bricks in order, do a trial laying: dry, without solution. Check the correctness of the laying with instruments.
The first row is dense, even, and solid. After laying it, check the correctness of the horizontal and vertical direction with levels. The strength of the entire structure depends on this. When laying 2-3 rows leave space for storing fuel and installing pipelines.
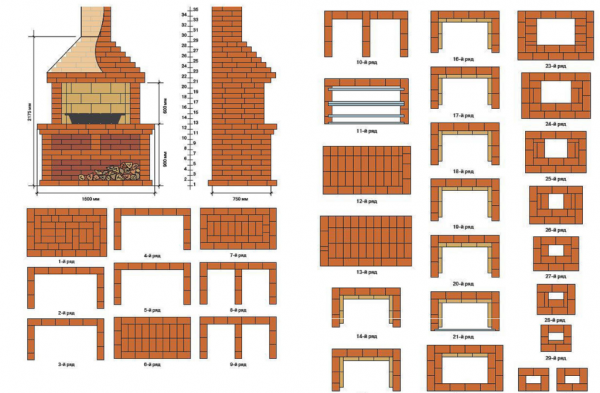
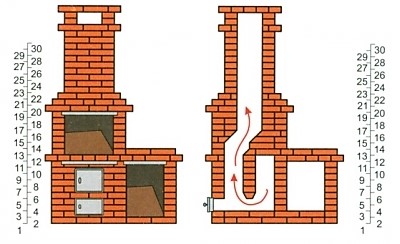
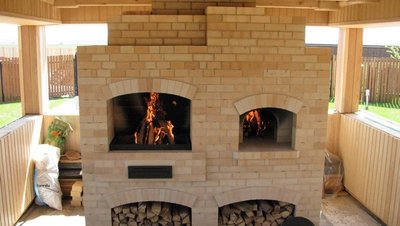
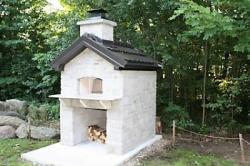
Photo 3. Option for laying out a brick oven with barbecue. The finished device is also shown.
On the 5th row install a metal grate on 6 and 8 - insert pins or brackets for barbecue grates. Such brackets can be mounted at several levels, which will allow you to move the grates while cooking barbecue, making the food more fried. From the 12th row and up, up to the 17th, you can install a hob or provide a recess for a cauldron.
When laying, leave smoke hole location, make a bookmark of the chimney damper.
It is important to constantly monitor the correct vertical and horizontal alignment of the masonry, to ensure that all the bricks are the same, without cracks or deformations. Correctness of the angles of the row of brickwork Check with a square or a cord. If the row is laid out correctly, the distances between two pairs of opposite corners will be equal.
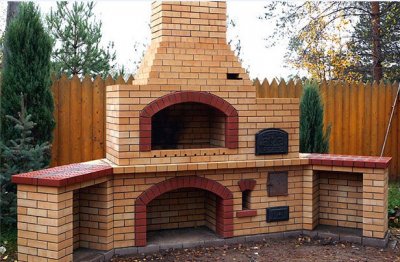
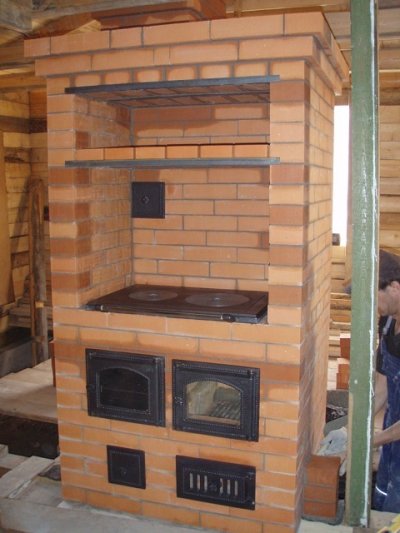
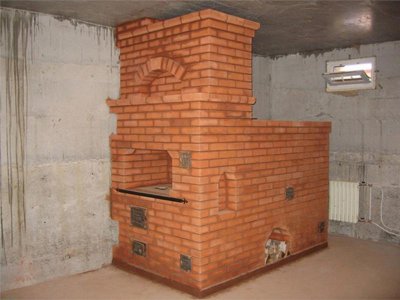
Photos of finished projects
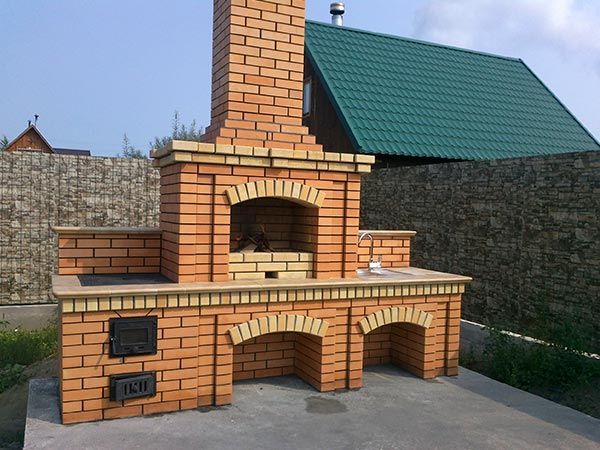
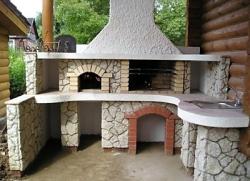
Photo 4. The finished project of a brick oven with barbecue. The device also has a built-in hob and sink.
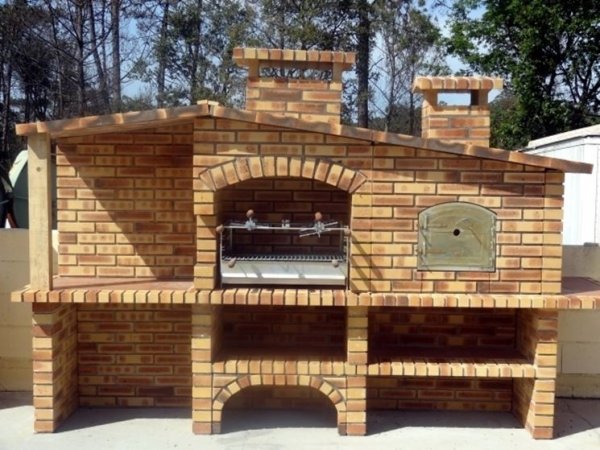
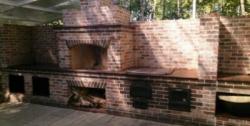
Photo 5. The finished brick barbecue oven. There are compartments for storing various equipment, as well as a convenient table.
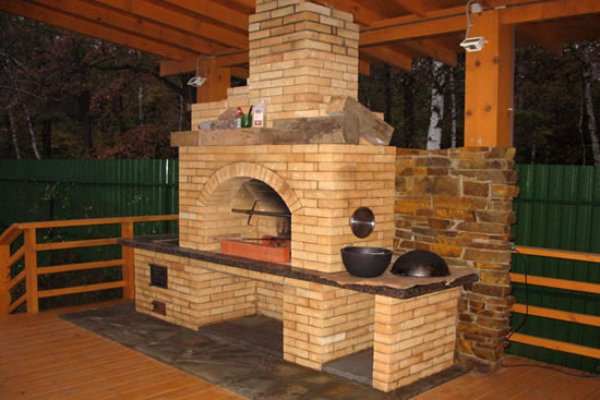
Photo 6. A simple version of a brick barbecue oven. There is a countertop and a place for cooking on the side.
Possible difficulties and problems
If, when checking the horizontal or verticality of a structure with a level If there are noticeable distortions and deviations, the reasons may be:
- incorrect, uneven laying of the first row of bricks;
- guide cords are not installed to ensure the accuracy of laying the corners vertically;
- incorrect installation of cords;
- the masonry of rows is not according to size.
Important! Follow the laying plan carefully after laying each row. check the vertical and horizontal alignment of the structure.
Useful video
Watch the video, which shows the process of laying a small brick oven with a barbecue and a compartment for a cauldron.
When the barbecue oven is ready
When the construction is completed, the new The oven requires thorough drying. For this purpose, it is advisable to build a canopy or cover the device with polyethylene film in case of precipitation. Within 5 days and it is advisable to let the stove stand in a dry state during the summer.
Then It is important to carry out a complete fire without using the cooking functions. If the oven functions as designed and there are no malfunctions, you can start barbecue.

Comments
Then we had to redo it and adjust the dimensions with mortar. It was a lot of hassle. We need to check it right away.