Both decoration and reliable protection for your favorite stove: how to plaster a brick structure with your own hands?
High-quality plastered brick ovens are not only interior decoration, but also significantly increase strength and reliability structures, ensure its tightness and resistance to cracking.
Plastering is effective prevents smoke penetration through holes in old brick ovens.
Prevents occurrence in new designs chips and cracks, which may arise due to temperature changes in the furnace, eliminates the possibility of smoke on the walls and makes the operation of the furnace more secure.
Content
Is it possible to plaster a brick oven with your own hands?
Plastering brick structures with your own hands is not particularly difficult, if all necessary rules are observed in the work process, as well as the relevant requirements for the composition of the mixture.
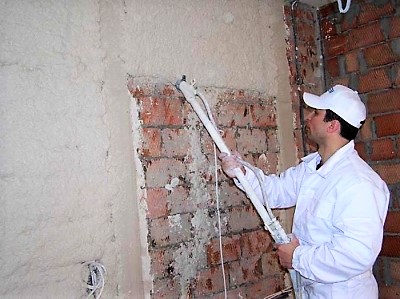
The process of plastering stoves involves applying a solution in two layers thick, not exceeding one centimeter, onto a brick surface moistened with water. The application of the finishing layer of plaster mixture is provided after the first one has set.
The work of plastering brick structures is carried out using tools specially designed for this purpose and is carried out in several stages, which involve:
- preparation necessary for work tool;
- cleaning and priming brick surface of the stove;
- calculation quantity and composition of the working mixture;
- kneading solution;
- wetting with water working area of bricklaying;
- application first layer working mixture;
- coating second leveling layer of plaster.
Advice. After the finishing layer has set, all irregularities and formed the cracks are moistened with water and rubbed down using a grater in a circular motion.
Tools for preparing and applying plaster
Plastering brick structures requires preliminary preparation of all necessary tools.
You will need:
- spatula — for applying the working mixture to the surface when forming corners;
- trowel — for uniform distribution of the solution over the entire surface;
- hammer - for driving nails into the joints of brickwork, used in combination with a chisel;
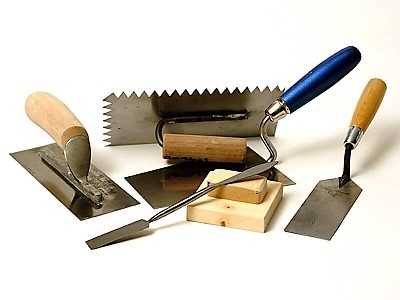
- chisel — for making notches on the surface of the brick;
- scissors - for cutting fiberglass mesh;
- grater — for leveling the plastered surface;
- ironing board — for smoothing the applied plaster;
- brushes — for applying primer to the wall before plastering the stove;
- metal brush — to clean the surface from old deposits;
- level - to prevent possible unevenness on the surface;
- plumb line — to determine the level of plaster applied to the wall;
- rule — to control the thickness of the layer of mortar applied along the beacons.
Reference. A set of tools used for plastering stoves depends on certain features of the constructed furnace, characteristics of its appearance and defects identified as a result of operation.
Composition and calculation of the amount of working mixture
There are certain requirements for the composition of the plaster, related to temperature changes when heating the furnace structure. Elasticity solution is the main condition, without which it is impossible to achieve a good result, and the high thermal conductivity of the materials included in the mixture allows for maximum heating of the premises.
For plastering a brick oven the following components are added to the solution:
- clay;
- sand;
- fireclay;
- asbestos;
- gypsum;
- lime;
- cement;
- fiberglass;
- small straw;
- salt;
- water.
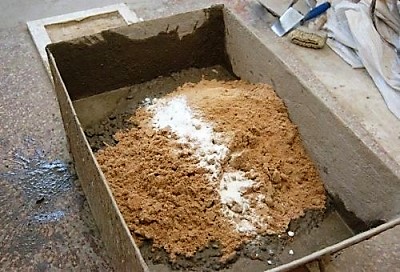
Main material when making the solution yourself - clay, from which various types of mixtures are most often mixed for plastering stoves. When preparing the solution, the clay is rubbed through a metal sieve and soaked in water. Liquid is added until the clay is covered by one centimeter.
The required proportion solution depends on the degree of fat content of the clay, which can be reduced by adding a certain amount of sand. Sand-clay mixture mix until a viscous elastic consistency is achieved thick sour cream. A solution consisting of two components, are called simple.
More complex Mixtures involve the addition of other materials that, when mixed, must have the same thickness and elasticity.
Important! The remaining components can be added to the main composition. in small quantities, which do not affect the elasticity of the solution.
Calculate required quantity prepared clay-sand solution is not difficult. This composition has long drying period, however, when adding components such as gypsum or cement, the setting time of the mixture should be taken into account and it should be mixed in an amount that can be used in a certain working time.
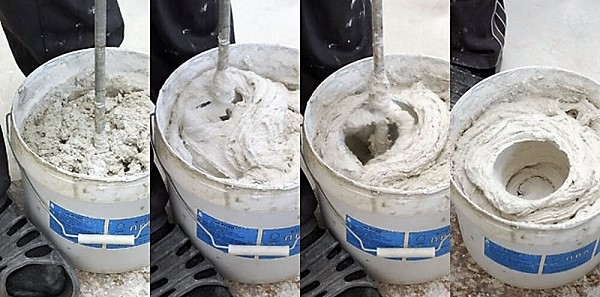
Photo 1. The process of mixing the plaster mixture: it is necessary to continue until the substance turns into a light, homogeneous mass.
For gypsum contained in the solution setting time plaster is about 10 minutes, cement - 20-25 minutes. The amount of the mixture being mixed is significantly affected by the speed of the work, as well as the proportion of the components added. One of the most durable and elastic solutions are considered to be a mixture of sand, clay and cement (gypsum) in ratio 2:1:1.


Brick surface treatment
Before plastering the work area, it is necessary clear it from existing irregularities and dirt, and then use a chisel to make notches for a stronger connection of the mortar to the brickwork.
For better strength of plaster in seams at a distance of 12-15 centimeters from each other is possible hammer small nailsso that they performed above the surface no more than by one centimeter at the level of the first layer of plaster. Preliminary treatment of the brick walls of the stove and seams is recommended with a special primer, as well as strengthening fiberglass mesh on a thin layer of mortar around the entire perimeter of the structure.
Step-by-step instructions: how to plaster a stove
Applying plaster to the base of a brick oven involves phased implementation of works, which depend entirely on the characteristic features of the installed structure and provide for various methods of carrying out the work process.
Main stages:
- Preliminary Preparation all necessary tools.
- Cleaning brickwork and making notches for a more hermetic connection of the mortar with the furnace walls.
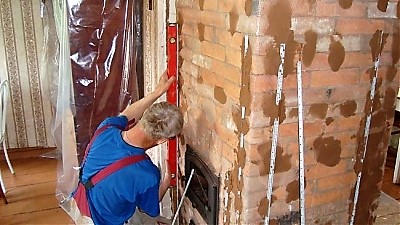
- Alignment surfaces using beacons, the role of which can be played by nails driven into the seams and protruding at a certain, verified distance.
- Surface coating primer and complete drying of this component.
- Kneading working mixture to strengthen the reinforcing mesh in an amount depending on the area of application and the drying rate of the components introduced into the composition.
- Strengthening with a solution applied by "splashing" fiberglass mesh and setting of the solution.
- Mixing the solution in the quantity required for application first layer plaster, taking into account the setting speed of the introduced components and the possibility of timely grouting.
- Applying the first layer of plaster, setting and grouting.
- Mixing the solution for application second layer in a quantity that takes into account the speed of setting of the plaster and the possibility of smoothing it out before it dries completely.
- Applying the second layer of plaster, it grasping, smoothing or creating a relief pattern.
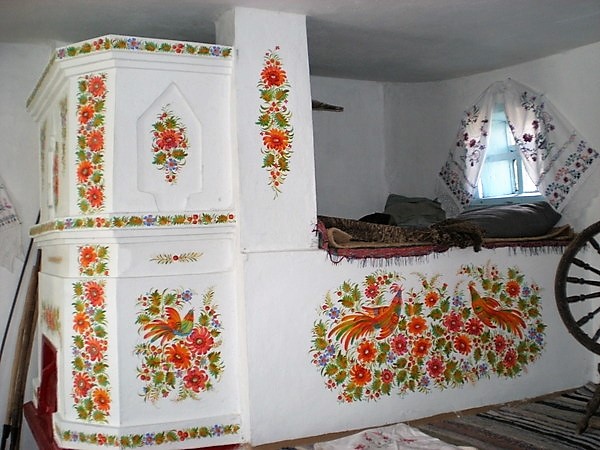
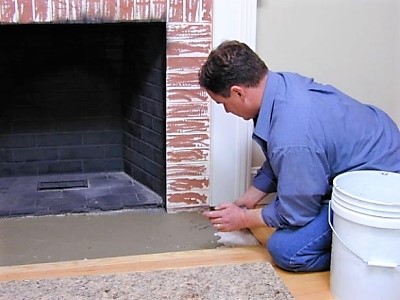
Photo 2. The work is finished: the plastered stove is additionally decorated with patterns using water-based paints.
Possible problems and difficulties
Quality work performed on plastering stoves depends on taking into account certain features, which you should familiarize yourself with before starting the work process.
New, recently built brick ovens throughout two months must undergo a certain stage of operational shrinkage, after which finishing can begin. If this rule is not followed, the plastered surface will crack, and it will be very problematic to correct the resulting defect, since grouting certain areas is ineffective. To eliminate the problem, all the work will have to be started over again.
To avoid problems, small cracks that appear on the applied drying solution must be rub in circular motions grater and smooth with a trowel.
Attention! It is possible to paint the finished surface of the stoves in a way that is safe for human health water-based paints only.
Application relief pattern and other work with plastered surfaces can be done on set but not completely dry surfaces.
Useful video
Check out the video, which demonstrates with explanations all the stages of finishing the stove with plaster mixture.
Fast and efficient finishing
Brick-built furnace structures don't take much time for plastering. The work process from surface preparation to plastering takes only several hours and allows the specialist to create not only a smooth but also a relief surface, and also to use it to create a beautiful appearance special facing tiles.
The stylish finish of the brick structure of the stove is also achieved thanks to the manufactured heat-resistant finishing fittings, which decorates the edges and corners of plastered stoves.


Comments
And under no circumstances should you light the stove until the plaster dries! It will crack!