Crafting from the most unusual materials at hand: making a stove from car rims with your own hands
When people set out to make a stove on their own, they often use materials at hand.
Wheel disks are great for building a heating structure – iron part of a car wheel. Thanks to quality and thickness of metal They are ideal for this purpose.
Content
Pros of a stove made from car rims
The advantages of such a stove are obvious:

- no need to spend money on materials;
- the metal's resistance to high temperatures and fire makes it possible to use any type of fuel;
- a variety of disc options will allow you to build a stove of optimal dimensions;
- the material has high heat transfer;
- the thickness of the metal increases the durability of the unit;
- quick and easy construction of the device.
From wheel disks It is possible to make several types of heating structures:
- for a bathhouse;
- for a cauldron;
- barbecue;
- potbelly stove.
Making a sauna stove with your own hands
The construction of the oven includes preparation and the manufacturing process itself.
Using truck rims
If you suddenly only got truck wheel rims, don’t worry – they will fit too. A stove made from them will last even longer due to the thickness of the metal.
Important! Only steel disks are used; light alloy ones are not suitable for these purposes.
Necessary inventory
To build a heating unit you will need:
- 4 identical wheel rims the required size;
- Bulgarian;
- welding machine;
- thick sheet metal or stove insert;
- legs (optional).
Scheme of a sauna stove made from KAMAZ wheel rims, drawing
If we take the disks from trucks, for example, Kamaz, thenThe service life of the device will increase two to three times. The essence of such a design comes down to the fact that 4 The disks are installed on top of each other and fastened with a welding seam.
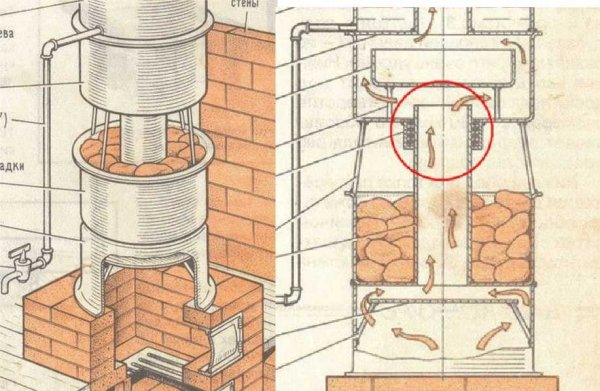
Photo 1. Drawing of a sauna stove made from car rims. Includes a firebox, a heater, and a water heating tank.
First disc serves as a firebox: a window is cut out in it for loading fuel and a door is attached. Second disc serves as a stove. Third is used as another heat exchanger, fourth is a water heating tank.
If necessary, metal legs are welded to give the structure stability.
Preparation
Take the wheel rims of the required size, clean them from dirt, rust or peeling paint residue. To do this roast them on the fire And Brush the metal. Decide which of the disks will be on the bottom of the structure. Make a chalk mark for the firebox opening.
The process of building a furnace
- The lower two disks will serve as the firebox and the heater. A window of approximately 20 by 12 cm. It is important here not to cut close to the edges - step back from them 2 cm, and the structure will not lose its strength. Next, the second disk is welded, and a grid is installed between them, on which the stones will be located.
- The water tank needs to be made airtight, so it needs to be welded to the disk. bottom made of metal sheet. A water tap is installed on the side.
- Next, all the individual parts of the structure are welded together.
- Place a stove insert or a plate cut from sheet iron on the bottom of the firebox.
That's it - the stove is ready. If desired, you can weld legs to it.
First make cuts along the outlined contour, and then cut to the end. Be sure to sand the edges of the cuts, so as not to get hurt.
Reference. Cutting the firebox hole often causes difficulties. The metal is thick and the disk constantly falls or spins. The advice is simple - use a vice. Clamp the disk in them and cut a hole.
Having completed the design work, it would be nice paint a new stove heat-resistant paint. But you can only paint cooled metal, so wait until the structure cools down. The unit looks best in black.
Advantages of a disk oven
- The main advantage of a stove made of disks is its mobility. It is not heavy, easy to carry and can be placed anywhere.
- Another feature is the welded construction. will not deform or crack.
- The device is very it's heating up fast and gives off heat well.
Photos of finished projects
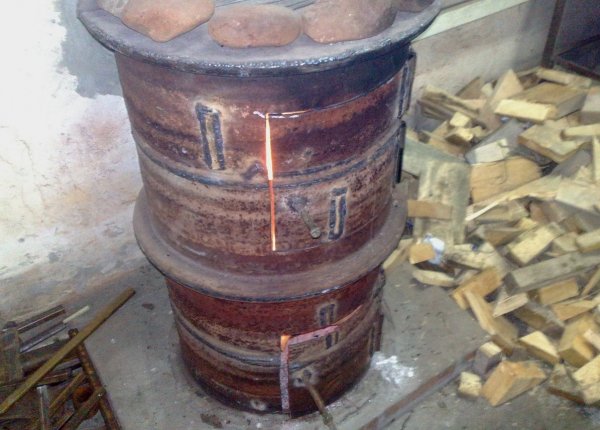
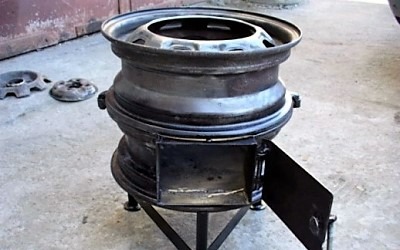
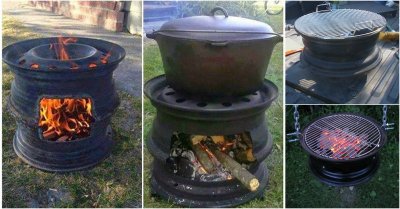
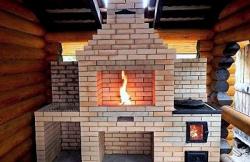
Photo 2. A version of a ready-made sauna stove made from car rims. The heater is located in the upper part of the device, there is no water tank.
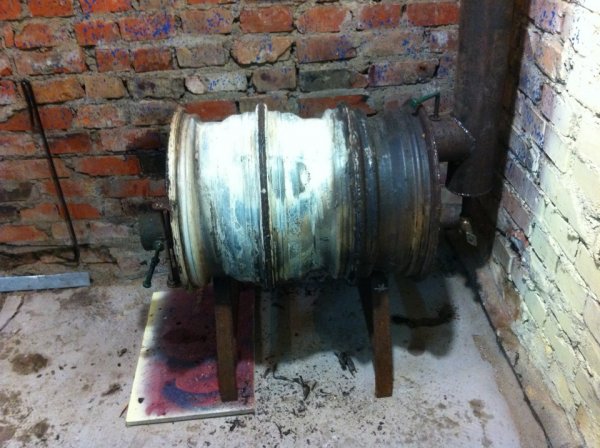
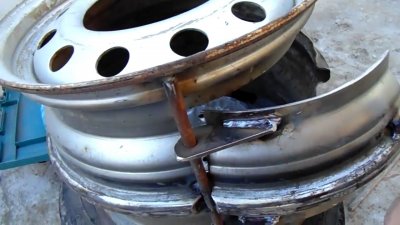
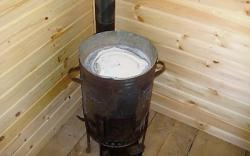
Photo 3. A potbelly stove made from old car rims. It consists of three rims, which are arranged horizontally.
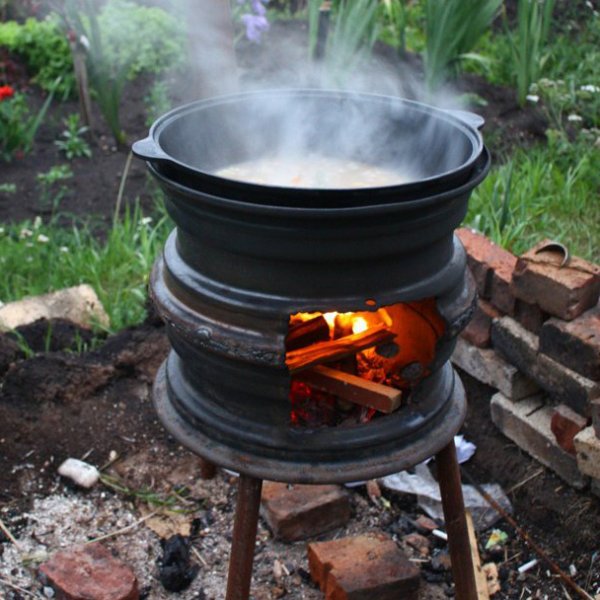
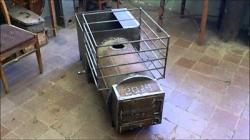
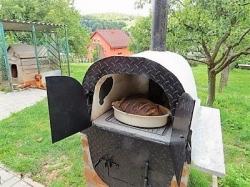
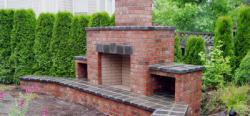
Photo 4. A stove made from car rims, including a place for installing a cauldron. The device can also be used as a barbecue.
Useful tips
- It is important to lay it in the welding area quality seam - there should be no visible defects on it.
- When working with a welding machine, you can’t try to weld everything at once - the work is done in stagesAfter welding the parts together, you need to wait for the seam to cool down to the touch temperature.
- When assembling the structure, do not forget that for the correct operation of the furnace it is important to provide combustion chamber size for fuel type, which you plan to use.
- After completing the work, be sure to test the design and eliminate any identified deficiencies.
Attention! All welding work must be carried out in compliance with safety regulations, in protective clothing and a maskDo not touch the parts until they have cooled down.
Useful video
Watch an interesting video that demonstrates the process of making a sauna stove from old car rims.
The stove is a friend on a hike and in the country
Don't be lazy - spend it 3-4 hours free time and become the owner of an amazing and very functional stove made from wheel rims. Its advantages are obvious:
- light;
- portable;
- heats up quickly and gives off heat;
- budget;
- Any fuel is suitable for it;
- does not burn out.
A mobile stove made from old wheel rims will be indispensable for use in a bathhouse. And if you build a stove with a place for a cauldron, the device will be a great addition to outdoor gatherings or meetings with friends at the dacha. By installing a cauldron on it, you can safely cook delicious soup or porridge, and by removing the cauldron and putting a grate on top, you will get excellent kebabs.
Comments
1) 2 discs with a radius of 13 mm;
2) grinder;
3) drill;
4) M6 screws;
5) nuts;
Nothing was bought in the store - EVERYTHING is made from recycled materials. The upper disk has a window for loading firewood. Additional holes are drilled in the upper part (13 mm drill) The legs were made from a 3 mm thick metal strip. To screw it to the base, I made a cut with a grinder and bent it at an angle of 90 * The central hole at the bottom was closed with a piece of 10 * 10 metal.