To make your home not only warm, but also beautiful: DIY stove for your summer house
You are viewing the section For the dacha, located in the large section Types of furnaces.
One of the main requirements for stoves for summer cottages is efficient heating of the room, in which they are located. Flames arise in the furnaces, sometimes a strong fire is accompanied by sheaves of fiery sparks.
A beautiful sight should not become dangerous, when building a stove, the design includes insulating elementsto avoid accidental fire in the house.
Content
Country stove diagrams, drawings
A device for heating a summer house is being manufactured in several options depending on the owner's preferences:
- Heating scheme is one of the most simple and popular. All elements of the design are aimed at heating the room. This type is well suited for a country house in which electricity is installed and a stove is used for cooking. The design includes a firebox, ash pan and chimney.
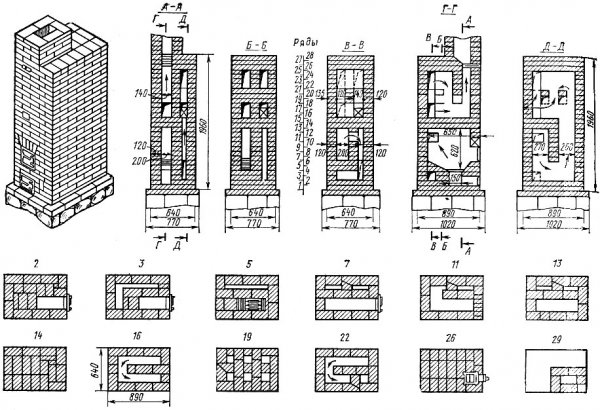
Photo 1. Drawing of a brick oven for a summer house, used for heating the premises. The order of the device is also presented.
- Cooking diagram more suitable for a summer house where people live during the warm season. The components of this stove maximally implement the function of cooking. Heating does not play an important role. The design consists of a brick body, a firebox, an ash pan and a chimney. It is possible to equip the stove with an oven, a water heating tank. This helps to create comfortable conditions.
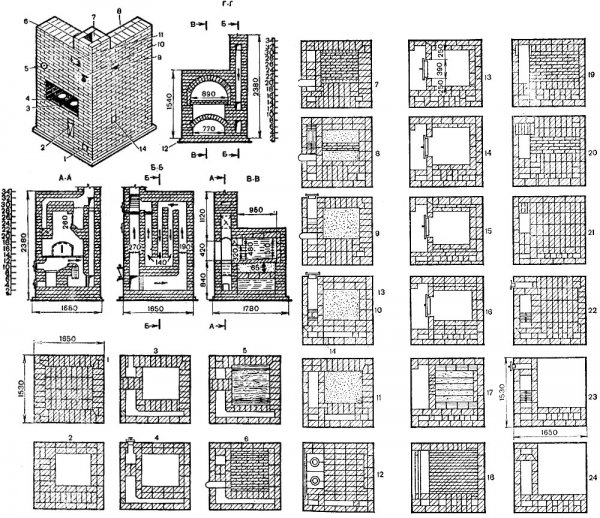
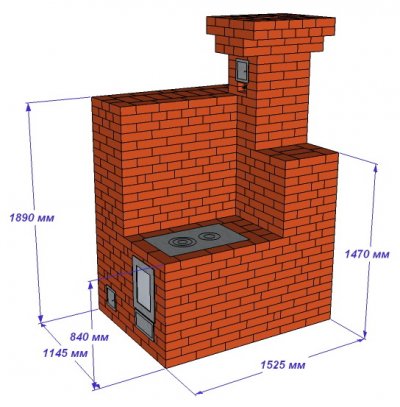
Photo 2. Drawing and ordering of a brick structure for a summer house with a cooking surface.
- By heating and cooking circuit a universal stove is being built. Its design includes a firebox, a chimney, an ash pan, a hob, and an oven. Such a stove quite massive and it is rarely installed in summer cottages where an alternative heating system is provided. It is the most popular in Russia, as it combines the functions of the two previously described schemes. With its help, they organize effective heating of the premises and prepare delicious food for the whole family.
Reference. The described options for stoves for summer cottages include additional elements according to the individual preference of the owner.
The role of the supplement can be played by a convenient bed, wood dryer, oven or hot water tank. Stoves have positive and negative sides, which the owner of the dacha takes into account before starting to purchase materials, choose a place and lay out the future device for heating and cooking.
What can the device be made of?
In order for the stove to be laid out successfully, preparatory measures are carried out that play an important role in subsequent assembly operations. To make everything work, you need to:
Select a project. You should be guided by the main points - the functionality of the stove and the design features of the room in which the future stove will be located.
If we are talking about large cottages, then it is better to give preference to massive structures equipped with thick walls.
It is not easy to build such a stove, it is desirable invite experienced stove-making masters.
The same cannot be said about a device for heating a small country house - anyone can handle the installation of such a structure. It does not have a large number of labor-intensive elements.
Select materials. The main building material for laying out a country stove is firebrick. Experts advise purchasing high-quality bricks from a reliable manufacturer and preparing them before use. The bricks are thoroughly cleaned, then soaked in water for 12 hours.
For laying out the firebox, it is used fireclay variety mentioned building material. Before use, it is not soaked, but simply rinsed. Particular attention is paid to the selection and preparation of cement mortar. It is purchased ready-made or mixed independently. You will need metal sheets with a thickness of at least 3 mm for making the firebox door. The hob, which is part of the design, is purchased separately, as is the water heating tank.
If the preparatory activities are carried out properly, the layout will go well. without delays and difficulties.
Preparing a place for the stove
Before you start laying out the oven itself, arrange foundation. Under favorable circumstances, the foundation is built at the stage of construction of the house itself. If this is not possible, then the stove foundation is arranged separately from the foundation on which the house stands. If the house shrinks, then the stove foundation should not be subject to deformation.
When constructing a foundation, you need:
- Place the cutting segment on the floor.
- Cut out space for the base.
- Go deep into the ground 70 cm.
- Build wooden formwork.
- Protect the wood from moisture contained in the cement. To do this, lay thick polyethylene around the perimeter.
- Pour the cement solution to the height of the formwork.
- Place a metal mesh on top to act as a reinforcement.
- Place on a flat surface two brick rows around the perimeter.
- Lay roofing felt on top of the masonry in two layers.
If you perform all operations qualitatively, then the oven will be installed securely And will last for a long time.
How to build a stove for a summer house with your own hands
Once the foundation is prepared, it is necessary to:
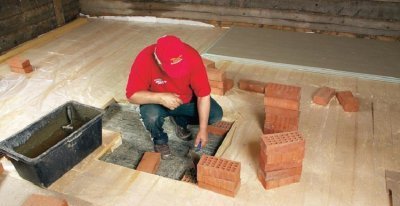
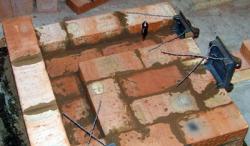
Start laying out the stove. 1 row special attention is paid to it, since the shape of the future structure depends on it. Markings are made with chalk, after which solid masonry begins.
Next they move on to the 2nd row, which differs from the first in that it is laid out taking into account the blower door. 3rd row It is installed taking into account the arrangement of the ash chamber. 4 and 5 They begin to form the firebox and lay it out with fireclay bricks. For 6 A similar building material is used. The foundation of the firebox is laid together with it.
7, 8 and 9 rows form the firebox itself. 10 acts as an oven cover. 11 is organized taking into account the installation of the hob. Laying out rows from 12 to 16 is the construction of chimney channels. 17 and 18 cover the cooking surface.
19 and 20 provide for the installation of a door through which the oven can be cleaned. Rows 21 to 23 are made in accordance with the chimney diagram. 24 and 25 are laid out taking into account the installation of the metal sheet. On the 26th row The damper is installed. 27 and 28 are necessary for arranging the chimney opening.
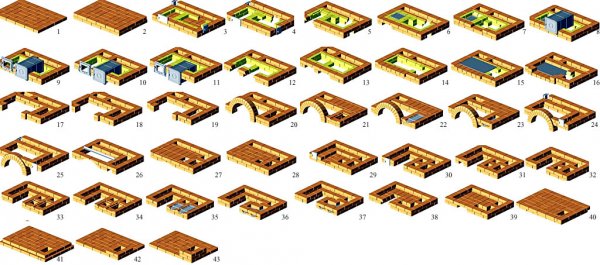
Photo 3. Option for laying out a brick oven for a summer house. Includes 43 rows in total.
Carry out the cladding. This procedure is started after the structure is completely laid out. It is used decorative stone, ceramic tile or red brickDuring this step, special attention is paid to the fact that any material that is applied to the outside of the building negatively affects heat transfer.
Dry the oven. This step is necessary because there is a lot of moisture left in the masonry from the cement mortar. To do everything correctly, open the firebox door and leave for 10 days. If the construction is carried out in summer, then drying occurs on its own. In winter, it is necessary to use a fan.
Attention! Strictly follow the sequence of steps described above, and the stove will be of high quality and durable! Properly prepared foundation and high-quality masonry guarantee a long service life.
After the layout, there is a need protect the structure from environmental influences. For this purpose, the external surfaces of the structure are lined with ceramic, clinker bricks or decorative tiles. Such a measure will not only protect the device, but will also give the stove an aesthetic and unique appearance.
Possible complications
There are situations when the owners of a summer house want to heat the room as quickly as possible, but they fail. In order for the air in the house to heat up, it is necessary at least 3-4 hours. This problem is typical for all brick ovens. The heating process is accelerated by making the brick walls thinner. This is advisable if a small room is being heated. A large amount of external cladding, such as tiles or decorative stone, worsens heat transfer.
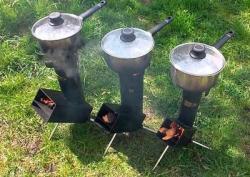
A brick oven is not capable of heating rooms that are relatively far away from it. This problem cannot be solved by adjusting the design of one device. In order for the air to be heated evenly throughout a large house, they install immediately 2-3 ovens in different parts of the building.
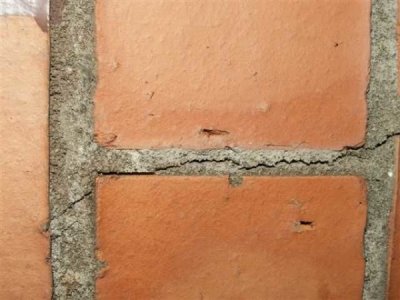
Over time, the structure is destroyed with some probability. This is due to shrinkage And seasonal ground shifts.
To avoid this phenomenon, The foundation of the stove itself cannot be connected to the foundation of the house. It is important to separate these two constructs and prevent any dependency between them.
During operation, the following occurs: deformation of the structure. This happens because when heated, the fireclay brick used in laying the firebox tends to expand. To avoid this undesirable phenomenon, a space is left between the ceramic and fireclay bricks during laying. gap 5 mm.
A serious problem during operation is the different degree of thermal expansion of the building materials that make up the furnace. This problem is solved by laying asbestos cord between metal and brick components.
The destruction of the masonry is also an unpleasant moment, indicating the use of low-quality clay. To avoid such a moment, building material of river origin, which has been lying in the open air, is used. not less than 24 months.
Installing a ready-made stove at the dacha
The location for the stove is determined at the stage of building the house. The most suitable place for placement is external wall. By placing the heating system in this way, the owner will create coziness and will be able to use the stove for cooking. But if you need to heat a large room, it is better to install the stove in the center.
If we are talking about a two-level house, then we think about heating the second floor. A special place is allocated in the foundation for placing a massive structure weighing about 200 kg. During installation adhere to the following requirements:
- A sheet of metal with non-combustible properties is placed on the floor in front of the firebox door.
- During installation, maintain a distance from the walls and ceiling that reaches up to 125 cm.
When installing, the first thing to do is the base is being equipped. Particular attention is paid to smoke removal. Today, the assembly of a chimney from ready-made parts with subsequent installation is widespread. It is also constructed from brick. Such a design has a longer service life. When installing a chimney, it is necessary:
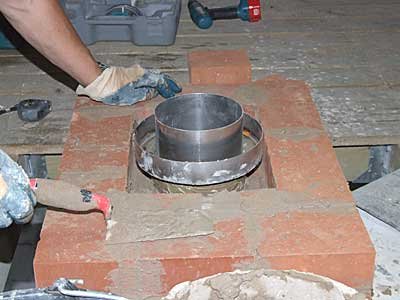
- Attach the first element of the chimney without insulation to the pipe.
- Make a hole for the pipe. It is made in a certain place and, if necessary, treated with a layer of thermal insulation.
- Raise the pipe to 4-5 meters and secure with special brackets.
- Install a spark arrestor and mesh at the end of the chimney. This will prevent moisture or sediment from getting inside.
Subject to compliance with all the described stages of choosing a place for the stove and compliance with the technology during installation the design will operate as efficiently as possible.
Photos of finished projects
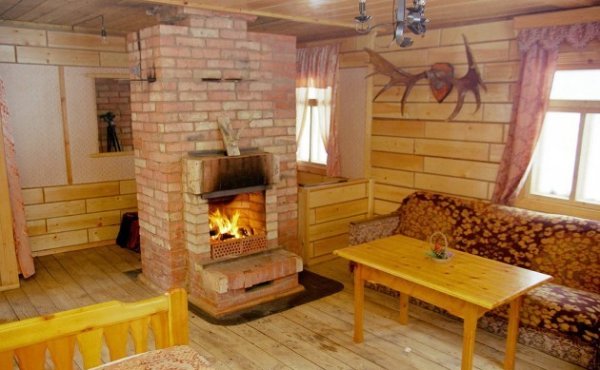
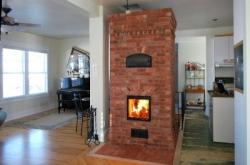
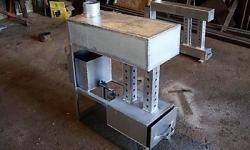
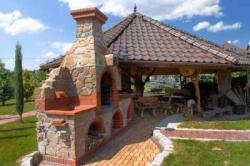
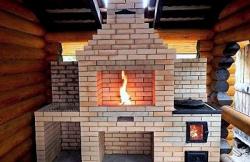
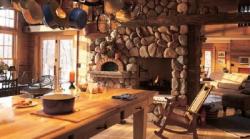
Photo 4. A fireplace stove made of brick. The device is installed in the center of the room.
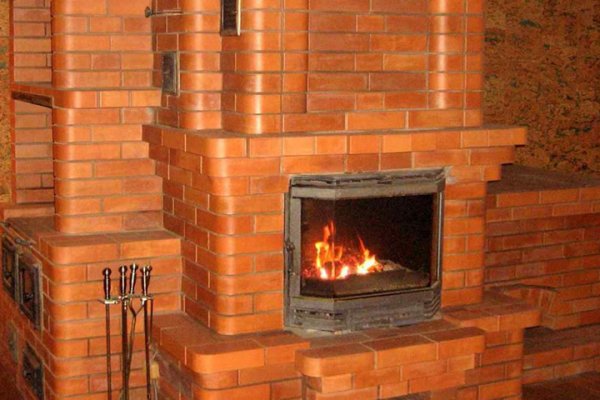
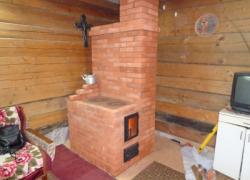
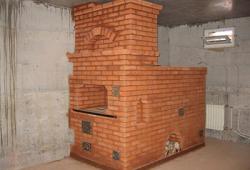
Photo 5. A stove for heating the room, made of brick. The firebox is enclosed with heat-resistant glass, so you can admire the fire.
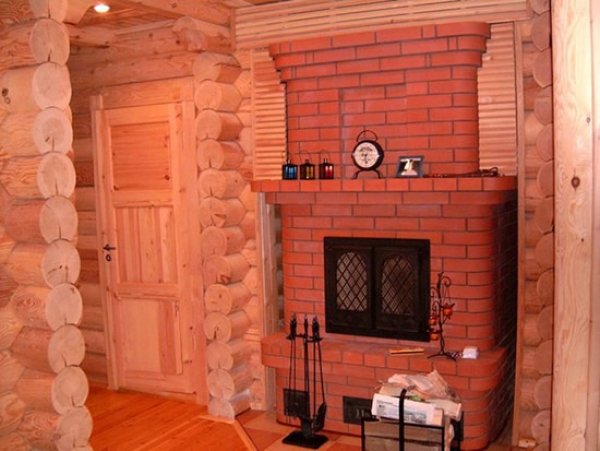
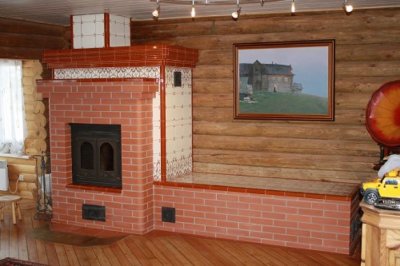
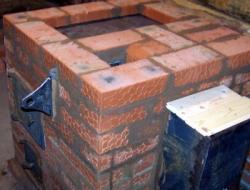
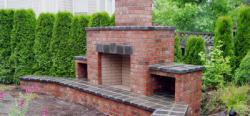
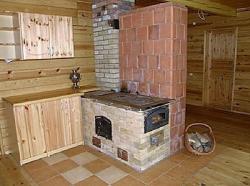
Photo 6. Brick oven for a summer house. If the device is located next to wooden walls, they must be impregnated with fire-retardant substances.
Useful video
Watch the video, which demonstrates the process of designing a brick oven for heating a summer house, and shows its order.
Correct operation of the device
To ensure that the constructed stove does not cause problems such as unwanted fires, you should:
- Clean the oven before intensive use. If necessary, whitewashing and repairs are carried out.
- Provide thickening of brickwork in places of contact with wooden floors.
- Do not leave the oven running unattended.
- Do not use flammable liquids such as petrol or kerosene.
If the described fire safety measures are observed, the use of the heating system will not cause any problems.


Comments